


How to put a black and white photo – 6 average in 2023, reduce a color image in a single color – Microsoft support
![]()
Reduce a color image in a single color
Publisher offers several color filters, choose the one in black and white
How to put a black and white photo ?
Get the black and white effect with photoworks or try other methods
For Windows 11, 10, 8, 7
For macOS 12 and superior
How to pass an image in black and white – 6 methods in 2023
You wonder how to transform a color photo into a black and white shot ? Multiple cursors of your current photo editor confuses you ? Whatever you try, your published photo is just a mixture of indistinct gray ? Do not be discouraged, we have 6 methods to offer you to make your task easier.
First, why put a color photo in black and white ? Would it not be degrading it ? For many of us the photos in black and white are only vestiges of the past. However, it happens that a photo devoid of colors displays much more details than a colorful photo. Black and white underlines the texture, highlights the silhouettes, allows you to play with contrasts, to add noise for a retro touch. No color photo will allow you to achieve these results.
How to put a black and white photo ? And without any difficulty ? Here are the 6 different software that will help you accomplish this mission in no time:
- 1. Put a black and white image with photoworks
- 2. Pass a black and white image with paint
- 3. Transform a photo in black and white with Microsoft Publisher
- 4. Convert an image in black and white with Photoshop
- 5. Put a black and white photo with GIMP
- 6. Put a black and white photo online
Continue to read and choose the one that suits you.
Method 1. Put a black and white image with photoworks
And if you could put your photo in gray levels by clicking on a single button ? Without drop -down lists or complex menus. But is it possible ? Of course ! Photoworks of which there is the free trial version in French, is simple to use image editing software. It has an intuitive interface and abounds in various functionalities.
Here are the steps to follow to transform a color photo into black and white in photoworks on Windows and Mac:
Step 1. Launch Photoworks
Start the program and import your photo.
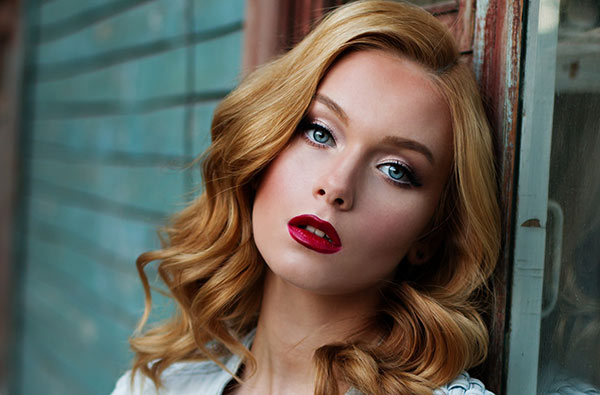
Choose a photo to put in black and white
2nd step. Change your photo with a black and white shot
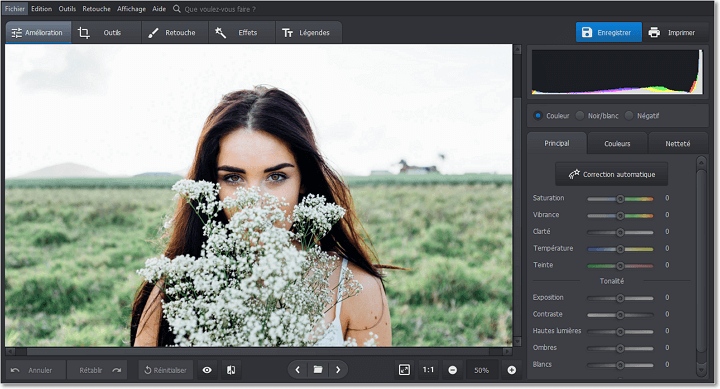
Go to the “Improvement” tab and check the “Black/ White” box to remove the colors.
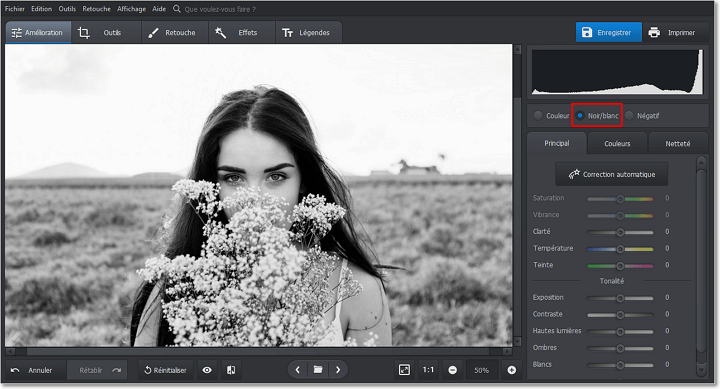
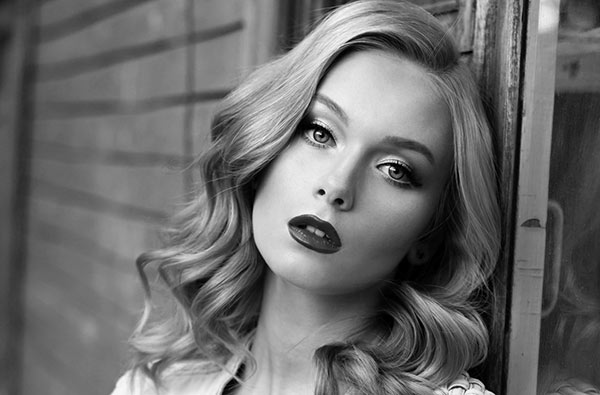
Just check the “black/white” box to convert your photo to gray levels
Step 3. Slide tone sliders for more subtle adjustment
If you need to adjust the result, use the tone sliders. For example, you can increase or decrease the brightness of the photo by sliding the cursors of whites and highlights, while shadows and blacks affect the dark areas.
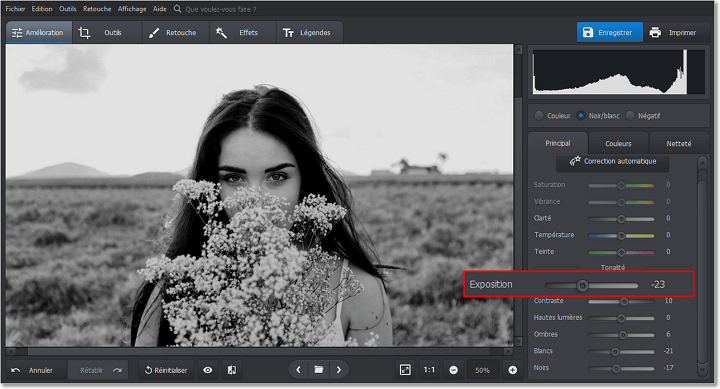
We decrease exposure to slightly darken clear areas
Step 4. Record your work
Once finished, click “Save” to save changes.
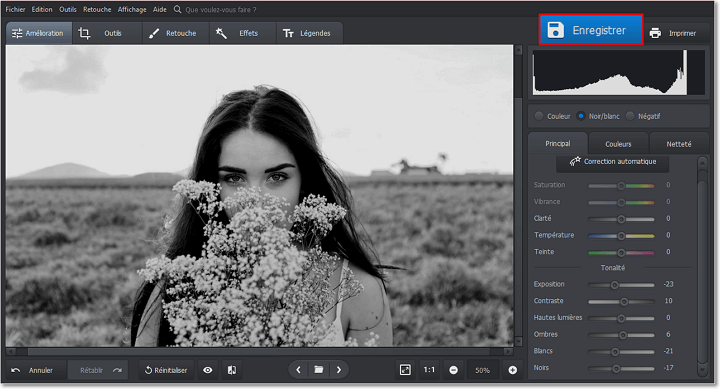
If you like the result, save your photo in black and white
Do you know other techniques to give your photos a vintage appearance ? Photoworks offers a simple and effective way to age a photo – apply photo filter effects that allow you to obtain a superb retro -stylized snapshot in one click. I recommend that you try vintage effects categories and cinema effects. You can’t wait to start ? Just click the button below to download this software.
For Windows 11, 10, 8, 7
For macOS 12 and superior
It seems easy, no ? When you start to use photoworks, you will discover several other creative possibilities: a simple correction of colors or the lighting with the complex retouching of portraits and landscapes.
Method 2. Pass a black and white image with paint
If you don’t want to acquire an image editor to change just a few photos, try free software. These programs may put less tools at your disposal, but in certain situations they will save your life. Microsoft Paint is an example. Unlike other specialized software, no payment, subscription or download is required with this software. If you use, say, Windows 7 or one of the subsequent versions, Paint should be provided with and therefore preinstalled on your PC.
If you decide to try paint, do like this:
Step 1. Open Paint
Launch Microsoft Paint and import your image.

The program has a very simple interface and even suitable for beginners
2nd step. Go to the “Image” menu and find the converter in black and white
Open the image menu and choose “Properties”. Now check the “black and white” box.
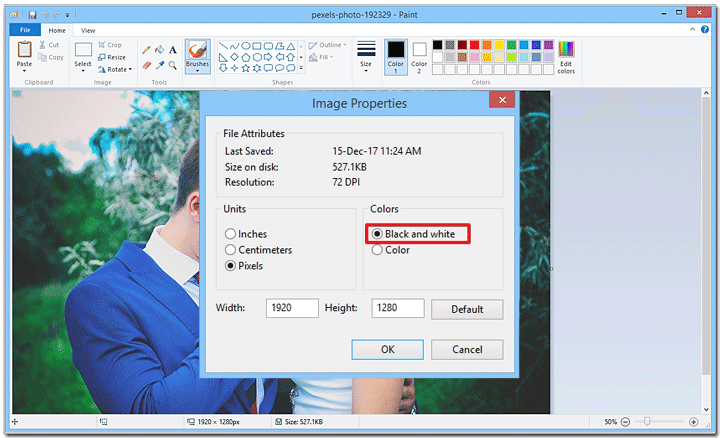
If you do not have the “black and white” option, install a new version of Paint
Step 3. Save your work after changing the colors
Now click on the recording icon to save the new image.

Do not forget to record the image in gray shades by clicking on the small icon
Paint is a useful and pleasant program, but being an application integrated in Windows, you cannot expect miracles. But if you use the latest version of Windows 10, you can try 3D paint that has a range of expanded tools and offers new photo editing possibilities.
You are looking for a way to give a professional appearance to your shots even if you start in photography and you do not have a high -end camera ? Learn how to improve the quality of an image in a few simple steps and make all your perfect shots effortlessly.
Method 3. Transform a photo in black and white with Microsoft Publisher
If you are passionate about the creation of calendars, greeting cards or business cards with specialized software like Microsoft Publisher, this method is for you.
For uninitiated, Microsoft Publisher is one of the Microsoft Office office software often used for presentations or the writing of texts. This software allows you to create various designs and layouts and then print them. The advantage of this program is that we can also do basic image editing.
If you use Publisher, here are the steps to convert a black and white photo to this program:
Step 1. Launch Microsoft Publisher
Start the program, create a new project and import your JPG photo. Place it on the page.
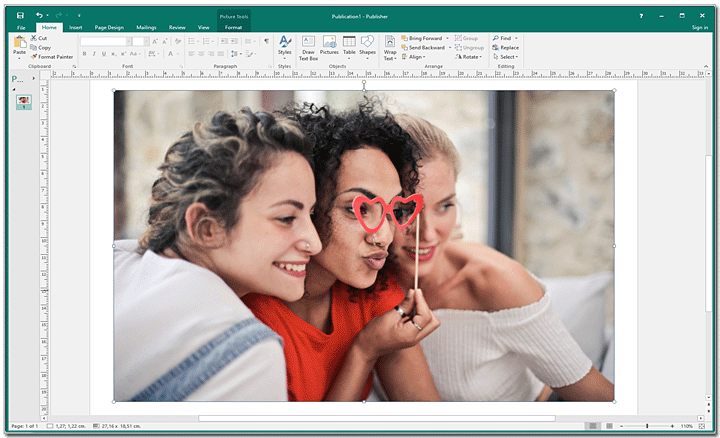
First, choose a layout and add the image to convert to black and white
2nd step. Apply the black and white filter
Click on the left on your image to open the editing panel. Choose “Recolor”. Now select the black and white filter from the drop -down list.
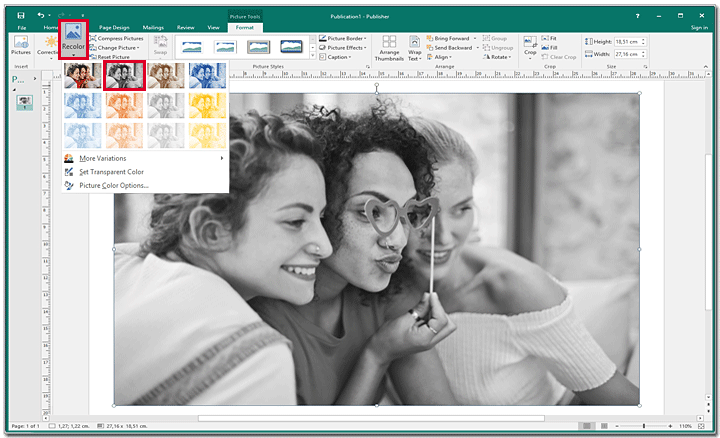
Publisher offers several color filters, choose the one in black and white
Step 3. Save the changes
Satisfied with the result ? Click Save to save the edited image. Rename this version if you want to keep the image in color too to modify it later later.
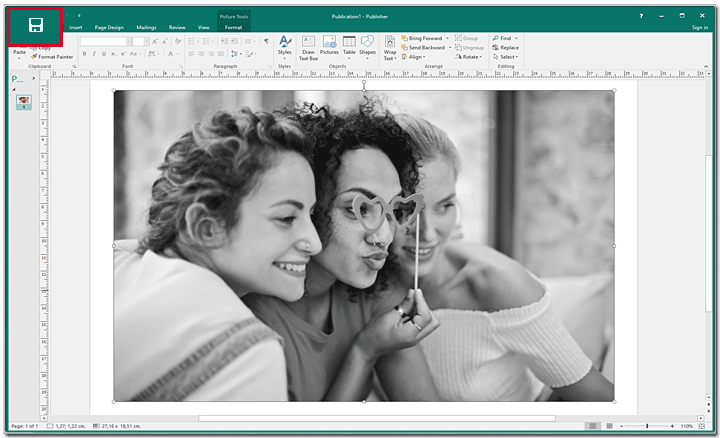
There is no adjustment option, so just save the image in black and white
Let’s be honest: Microsoft Publisher is not an image editor. If you want to make a complete touch -up where the application of the black and white filter would only be an intermediate step, you would better try other programs. On the other hand, if you are looking for simple changes for a printing card or layout, then Publisher will surely help you reach your goal.
You like to apply creative effects to your photos that you put online afterwards ? Remember to protect them from unauthorized use – Find out how to put a watermark on a photo with different methods.
Method 4. Convert an image in black and white with Photoshop
If you ask someone to appoint an image editor, in 99% of cases the first answer will be Photoshop. He is considered one of the best photo editing software, and rightly so. You can do just about all your creative ideas with this program.
If you also use it, I’ll show you how to put a black and white photo on Mac and on Windows with Photoshop:
Step 1. Open Photoshop
Launch Photoshop and open the image you want to edit.

The Photoshop interface differs from one version to another, but the principle remains the same
2nd step. Create a black and white adjustment layer
In the top menu bar choose layer> New adjustment layer> black and white.
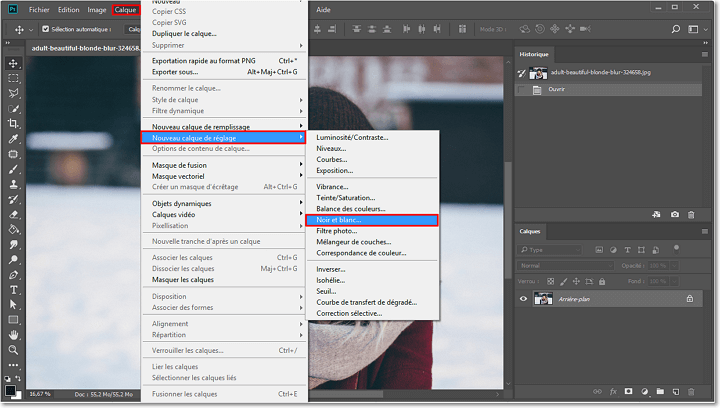
Photoshop creates a new layer without damaging the image that you are free to modify
Step 3. Slide the sliders to adjust the black and white effect
Slide color sliders to lighten or darken certain areas or save your time and choose the existing preset. Do not forget to press CTRL+S to save the new image.

Merge the layers and save your photo in black and white
If you work with Photoshop CS2 or Photoshop Elements, you may not be able to use the black and white mode described above. In this case I suggest you use the adjustment layer in saturation mode.
All these adjustment layers and these sliders for different colors may seem complicated to certain users. But once used to this software, you will process your images without problem. The question is: do you want to get used to it ? If your answer is no, look for another black and white photo creator program.
Method 5. Put a black and white photo with GIMP
If you are an experienced user and sophisticated settings are not afraid of you, but the cost of the Photoshop subscription if we can offer you a free alternative – the GIMP IMAUTER publisher. Equipped with a complete toolbox and a variety of professional features that can be expanded again using plugins, this software gives you several possibilities to convert a black and white image. Here is the method that allows you to personalize the result to the maximum:
- Open your photo in Gimp. If you don’t have Gimp yet, download it from the official website. After installation, launch the program, press File and browse your folders to open the photo to modify.
- Find the channel blender tool. If you do not know where to find a tool, press aid> search and execute a command. Type the tool name and click on the proposed option to display the channel blender window.
- Adjust the settings manually. Check the “Preserve the brightness” box and move the 9 cursors adjusting the rate of red, green and blue in each of the 3 RGB channels until you get a gray level image. The mixer of colors has the advantage of giving you great freedom of adjustment of nuances and contrast.
- Save your image in black and white. Once you are happy with the result, press validate to apply the changes. Then go to the File tab and select the Export Under if you want to choose a current format like JPEG or PNG. Change the image name and click Export.
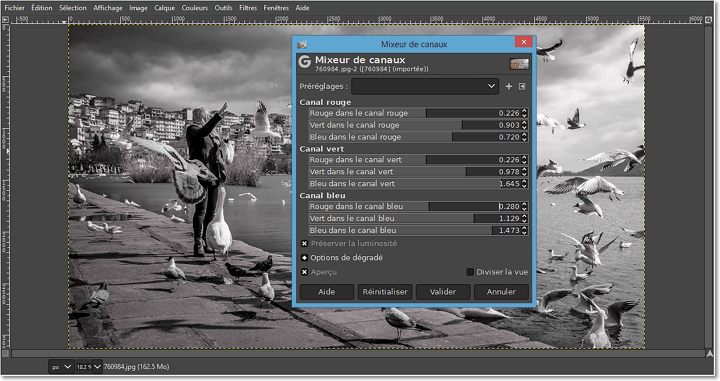
Gimp allows you to work each color in order to obtain the desired effect
You have ideas in your head and you would like to create cool photo montages ? No need for sophisticated image editors for this ! Consult our tutorial to find out how to superimpose two photos in a few seconds.
Method 6. Put a black and white photo online
You are tired of complicated software ? Take a look at Lunapic. It is a simple to use image editor that works online and allows you to accomplish various tasks, from basic cropping to the deletion of objects. Like any website, it is accessible from any device. At the same time, it shows you advertisements and forces you to put your personal photos online. But if you want to try it, here are the steps to pass a black and white image with Lunapic:
- Load your photo. Go to the Lunapic website and import the image you want to edit. You can load it from your computer or paste an URL.
- Apply the black and white filter. The service offers several filters to modify your images. Select the black and white filter, and it will be applied automatically. You can adjust the level of the effect using a cursor.
- Export your edited image. You are satisfied with the result ? Click on file> Save Image and save your image under default jpeg or select another format. You can also share it on Facebook, Pinterest or another online service.
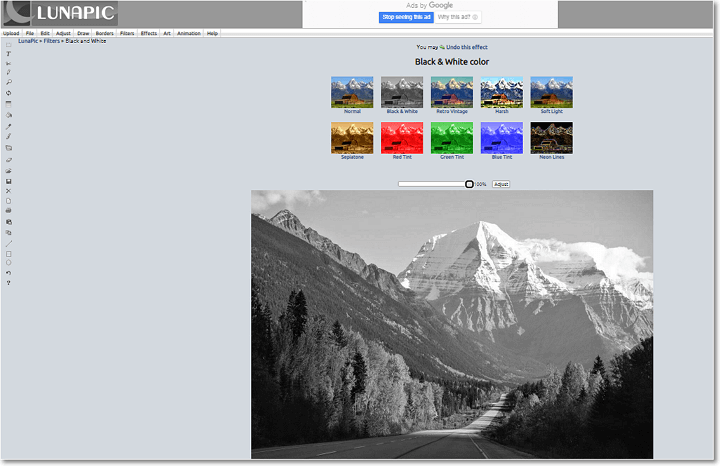
You can put your photo in black and white in a few CICS with LUNAPIC online
We have just observed the 6 best methods for 2023 that you can use to put your photos in black and white. Decide which software is most suitable for your objectives and skills. If you are an experienced photographer, prefer Photoshop or Gimp. If you want to convert your images to black and white by applying a simple filter, try Paint, Microsoft Publisher or the Lunapic web service. And to modify your photos effortlessly and with an adjustable result, use photoworks which allows you to make your creative ideas and improve your shots in a friendly and artistic way.
The team of authors Photoworks, passionate about photography and graphics. We are happy to bring you
quality content to make the use of our software easy and pleasant for you.
Reduce a color image in a single color
You can simplify a color image in Publisher by reducing the number of image colors. This can reduce the file size of the image and reduce printing costs. Applying a uniform color to all images of your composition can also unify your composition.
Modify an image in shades of a unique color
- Click on the image you want to modify.
- Below The format tab, click on Recolor,then on the color of your choice, or to see more choice of Colors, click on other variants.
Restore the original colors of the image
The original color information of the image remains stored with the image, which allows you to restore the original colors of the image at any time.
- Click on the image, on The format tab, then on Restore the image.
Modify an image in gray or black and white scales
- Click on the image you want to modify.
- Below The format tab, click over,Then Select gray scale.
Restore the original colors of the image
The original color information of the image remains stored with the image, which allows you to restore the original colors of the image at any time.
- Click on the image, on The format tab, then on Restore the image.
You can reduce the number of colors in an image in three ways:
- Change the image in shades of a single color.
- Change the image to gray scales.
- Change the image in black and white.
Noticed : You can modify the images in EPS format (encapsulated postscript) only in gray or black and white levels.
Modify an image in shades of a unique color
- Right -click on the image to modify, then click on Format Image in the shortened menu.
- Click on the tab Picture.
- Below Image control,click over.
- In the dialog box Recolor the image, click on the arrow next to Color,Then click on the color of your choice or to see other color choices, click on other colors, select the options of your choice, then click on OK.
Noticed : If your composition uses spot tones, Offer other colors is not available.
- Click On Recolorier the image whole to apply colored shades selected in the whole image.
- Click on leaving the black parts in Black to apply color shades selected only to the parts of the image that are not in black or white.
Restore the original colors of the image
The original color information of the image remains stored with the image, which allows you to restore the original colors of the image at any time.
- Right -click on the image, then click on Image format In the shortcut menu.
- Click on the tab Picture.
- Click over.
- In the box dialogue recolor the image, click on Restore the original colors.
Modify an image in gray or black and white scales
- Right -click on the image to modify, then click on Format Image in the shortened menu.
- Click on the tab Picture.
- Below Image control,in the color list, click on Gray scale or black and white.
Restore the original colors of the image
The original color information of the image remains stored with the image, which allows you to restore the original colors of the image at any time.
- Right -click on the image, then click on Image format In the shortcut menu.
- Click on the tab Picture.
- Below Image control,in the color list, click on Automatic.
Noticed : You can restore all the original parameters of the image by clicking on Reset.