


Freebox Pop Fiber Branches Photo Reporting, How to connect my Freebox Revolution, Pop or Delta?
![]()
Freebox connection: how to plug my freebox revolution, pop or delta
You have migrated in Freebox Delta + Player Pop, here is the material received for fiber optic access, Side Server Delta.
Freebox Pop Connection


No copy, reproduction or loan is authorized © Busyspider.Fr
It is absolutely forbidden to record the images of Busyspider.fr on other websites.
Freebox Pop Fiber Optical Branches Photo Report
Fiber branches Freebox Delta Suite Migration Delta + Pop
Characteristics of POP POP Blocks

Creation July 26, 2020 – MAJ August 2, 2020
- Pop Server Fiber Optical Connection
- POP installation Server Fiber
- Pop Fiber Optical Connection on PTO
- Pop connectors Server
- Pop My 1st fiber synchro connections
- Pop: power supply blocks, player, rehearsal
- Pop: Tutorial Free instal fiber on video
- Delta/Pop: Fiber connections Suite Migration
- Pop: Info and tutorials published on the net
Freebox Pop The connection in fiber optic images
Details of connectors and power supply blocks of the Server, Player, Pop repeater
Little reminder: it is not allowed to copy all or part of this tutorial, nor to make them screen prints. However if you mention a detail found on this tutorial, it would be nice to indicate the source indicating this link. THANKS
Note: all images included in this tutorial are personal photos.

Freebox Pop Server Fiber Optical Connection

You have received in the package of your Freebox Pop, the fiber kit (if fiber optic subscriber) so you have everything you need to do – Fiber optical fiber, if your fiber optic access is already connected to the accommodation obviously.
The new subscribers will have to wait for the technician appointment that will come to the home to activate access and control the proper functioning of your fiber optic connection. It is therefore no longer the technician who brings the fiber kit, as was the case for other freebox, you already have everything you need for connection. But of course if concern, tech can help out for the fiber kit.
Migration subscribers, already connected in optical fiber, will be able to put in place themselves, very easily this special freebox pop fiber kit replacing the old connection which is often different. No one does not need a UN box with a POP Feebox, the fiber connection is done directly on the fiber port on the back of the Freebox. (The UN is integrated into pop)

The garter (optical cable) delivered in the fiber kit, is 2 meters in length.
Here is the SFP which will be inserted in the fiber port and in detail (for specialists) the characteristics.

Freebox Pop Installation Server Fiber

The start -up guide included in the package gives you the whole procedure, to install your fiber optic access, depending on whether you are old or new customer.
See below in real photos..
Old migration subscriber, the start -up is fast and easy, just take the SFP module, remove the plug that protects it and insert it -etiquette below in the fiber port of the server server.
Then connect the power supply connector to the USB-C port of the Freebox and connect the supply to the sector . that’s it for the server part.. However, it will be necessary to connect the garter to the Optical PTO socket .. See below in pictures.


The SFP module is to be slowly inserted into the fiber port, by reappearing the meaning (label below) and the notch, and until he heard a click.
Do not be surprised if the module is not completely hidden inside the freebox, it’s normal, not to force more if we heard the click
Freebox Pop Fiber Optical Connection on PTO
- ❶ The SFP was well inserted into the freebox fiber port.
garter to put blue on the SFP (freebox), taking care to align the little notch.
(after having in the little white cap which protects the end of the garter) - ❷ We now connect the garter on the green side to the PTO (optical socket), also paying attention to the lockout.
- ❸ All that remains is to electrically connect the Freebox, the green light from the power supply unit lights up.
The Freebox will start its start -up cycle. Do not disconnect especially until everything is finalized.
We can now set up an ethernet cable and connect it between the freebox and your PC: you have the internet.


Freebox Pop Connectic Server


Freebox Pop: My connections My first fiber synchronization


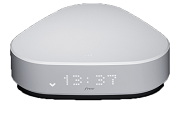
The OLED screen displays the time, but not permanently. After a few minutes it goes out, but can be reactivated by touching one of the keys on its screen. It allows like the Freebox Revolution/4K to access information menus directly from this screen. You will probably quickly have the use because during the 1st connection request to Freebox OS, you must validate by a key the change of word to pass to access Freebox OS.
Freebox OS is the internal freebox software that allows you to configure and monitor your freebox precisely.
The 1st fiber flow test carried out with the Freebox Pop on my connection. As we can see, it’s a beautiful speed. The maximum speed announced by Free is up to 2.5 Gbps in Download and up to 700 MPS in uplad. The maximum speed currently for me is limited by my network card which only allows the 1 gigabit. (I am not far away in synchronization) Few computers are to date equipped with a 2.5 Gbps network card. There are USB-C to Ethernet 2.5 Gbps adapters that will allow this functionality to be upgraded.
The Freebox screen will display the Max flow of the Freebox Pop. Logically we must see display: Down flow: 5 Gbit/s. This is the flow provided on this pop subscription.

Provisionally the screen may display less with Down debit: 1 Gbit/s, but it is only provisional, the time that free migre access to compatible equipment 5 Giga, as was done with the Freebox Delta for Migration to 10g-spon.
This to comply with the free sales conditions that provide this maximum speed on the subscription concerned. You will obviously be warned by Free of this migration if necessary.
Freebox Pop: Server, Player, repeater power supply blocks

Find above the characteristics of the power supply blocks of the POP Server, Player Pop and Pop repeater
Freebox Pop: Tutorial Free In Video The Fiber Installation

To watch from YouTube the aid for the new Freebox Pop in the series of YouTube video recently put online by free for its tutorials:
Free video tutorials on the YouTube channel
These videos are available in the “assistance” playlist of the YouTube channel: Free Tutos on Youtube
Delta/Pop: Fiber connections Suite Migration


You have migrated in Freebox Delta + Player Pop, here is the material received for fiber optic access, Side Server Delta.

As you can notice, there is indeed a garter included in the package of the Freebox Delta.
The SFP module will already be implemented in the fiber port
Freebox Delta, as we can see.


The Freebox Delta is delivered in fiber migration with the fiber module already inserted in part 2 back of the freebox.
The SFP module too is already set up on the fiber port.
All you have to do is connect the garter, respecting the meaning: blue side towards freebox, green side on optical socket pto.
To remove the protective plug of the garter and to pay attention to the detrump to insert the garter in the fiber port and on the PTO.

In the event that the connection is not compatible with the 10g-spon announced, Free will carry out a technical migration to set up the fiber connection to the Pon equipment, in order to respect the conditions of sale linked to the Freebox Delta and thus allow the Debit up to 10 GBP/s announced (with compatible PC equipment obviously)

Freebox Pop: all the info and tutorials published on the net

Find on a single web page on the Busyspider canvas all the publications on the net.
Official Free information.
Busyspider canvas tutorials
The publications of the big universes freebox forums, freenews
Publications on the net, press and sites.
Please respect the Netiquette and not copy on other websites (except of course, if prior authorization))
The publications and images of the Busyspider Images & Mounting © www site.busyspider.fr thank you for your understanding.
For information: the documents are updated regularly on the original site (texts and images/tag with the Busyspider logo)
Saved on other sites, the update is impossible, which would be harmful to the reliability of published information.
It is of course always possible to indicate an URL link, to send information to another website.
contact me
if necessary
On the Twitter account of the Busyspider canvas


Help topics created by © Busyspider
Legal framework for [Intellectual Property of the works] No copy/paste – even partial is authorized, including © Images © Busyspider of tutorials.
To refer to a subject, news, site tutorial, insert only the corresponding URL link, thank you.

No assistance by email
Register on a support forum for your questions. Free user forum
Confidentiality-Management Cookies
The statistics of this site require the use of cookie to improve individual aid. The data is in no way used for another use, nor transmitted to anyone. See according to your browser, the options to modify, if you do not wish to allow their use.
Independent site – no advertising
News  Historical
News 
Freebox connection: how to plug my freebox revolution, pop or delta ?


You have subscribed to a Freebox offer but do not know how to do it to connect it ? You do not end up with the different cables and freeplugs ? You do not know how to connect your Player Revolution, Player Pop or Player Devialet to your Freebox ? In this article we explain how to connect your Freebox Revolution, Pop or Delta, whether you have taken out a fiber optic or ADSL offer.

Subscribe a Freebox offer
Our advisers will guide you among the most competitive Freebox offers, depending on your eligibility.
Free Jechange Service
- The essential
- THE branches to be done for your Freebox depend on the offer you have chosen (Freebox Revolution, Pop Or Delta) and technology used (optical fiber Or ADSL)).
- The procedure is the same that you want to connect your POLYER POP to one Freebox Pop or to a Freebox Delta.
- If your Freebox blocks at a step During its configuration, we advise you to Check your connections and call it Free Customer Service If the problem is not solved.
Freebox connection: what is the material included with each freebox offer ?
Equipment that you will receive during your subscription to a free offer depends on different parameters.
First of all, the material is not the same depending on whether you subscribe to an offer Freebox Revolution, Pop Or Delta. In addition, you will not have the same connectors by subscribing to an offer ADSL or an offer fiber.
Find a summary of the contents of each box Freebox in the table below:
09 71 07 88 24
Free Jechange Service
Server Revolution case
Player Revolution case (drive Blu-ray and hard drive 250 GB integrated)
19.99€/month for 1 year, then 44.99 €/month
12 -month commitment
09 71 07 88 24
Free Jechange Service
Server Revolution case
Player Revolution case (drive Blu-ray and hard drive 250 GB integrated)
09 71 07 88 24
Free Jechange Service
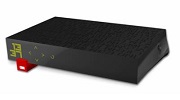
Server Pop box
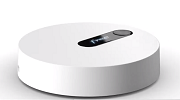
POLY POLYER
09 71 07 88 24
Free Jechange Service
Server Pop box
POLY POLYER
09 71 07 88 24
Free Jechange Service
Server Delta case
POLY POLYER
Player DEVIALET case (rental for € 6.99/month for 1 year, then € 9.99/month without engagement)
09 71 07 88 24
Free Jechange Service
Server Delta case
POLY POLYER
Player DEVIALET case (rental for € 6.99/month for 1 year, then € 9.99/month without engagement)
Server Mini 4K box
POLY POLYER
The offers are classified by price during the first 12 months of subscription. Free SEO
Connection Freebox Revolution: how to install my box ?
To take advantage of your Freebox Revolution, You will need to connect your Revolution (which acts as an internet box) as well as your Player Revolution To be able to watch TV with your Freebox Revolution.
The steps are different depending on the type of connection you benefit from: the connection of the Freebox Revolution in ADSL is not the same as for the version fiber.
You want to compare freebox offers available ?
Free Jechange Service
You want to compare freebox offers available ?
Server Freebox Revolution ADSL Server
Where to place my ADSL Revolution Server ? Before connecting your Revolution, Check that you position it Near the telephone socket Or Ethernet wall of your accommodation.
For connect your Server Freebox Revolution in ADSL, Follow the following steps:
- Connect the end of the cable RJ11 In the harbour Dsl, Located on the back of your Revolution.
- If your accommodation is equipped with Takes : insert the other end of the RJ11 directly in the Block T. If your accommodation is equipped with Wall Ethernet sockets : insert the other end of the RJ11 In The RJ45 adapter (supplied with your Freebox Revolution), then enter the cable of your adapter in your Wall ethernet socket.
- With the Freeplug : insert the power cable In the harbour 12V of your Revolution and the cable RJ45 in one of the ports Ethernet free. Then connect the Sector intake in your Wall electrical outlet.
- Once connected, the Server Revolution lights up and the configuration begin.
Stuck in a step ? If your Freebox Revolution stay blocked On a stage, think of good Check all connections. If the problem persists, do not hesitate to contact the Free Customer Service.
How to connect my fiber optic revolution server ?
Where to connect my fiber optic revolution server ? To facilitate its installation, we advise you to connect your Revolution has Proximity to the wall optical socket of your accommodation.
Here are the steps to follow to Connect your Freebox Fiber Optical Revolution ::

- According to your accommodation, The connection is done With or without optical converter. If you have an optical converter, insert the black block of the converter in the fiber On the back of your Revolution. Then connect the power tip optical converter in the Port 12V of the Revolutionary Server. Finally, remove the cork Optical converter. If you do not have an optical converter, take the SFP module And plug it into the fiber on the back of Server.
- Then take it optical garter and remove it white cap at the end of Blue connector. Insert the connector into the optical converter or in the SFP module Depending on your case.
- Bring the other end of the optical garter and remove it cap of green connector to connect it to the port of your Wall optical socket. If your catch is quadrifiber (with 4 fiber ports), connect the connector to the red port. If she is bifiber (with 2 fiber ports), connect your connector to the blue port.
- Insert it power cable of Freeplug either in the tip 12V of optical converter either in the port 12V On the back of your Revolution.
- Plug the cable RJ45 of Freeplug in one of the ports Ethernet free.
- Connect it Sector intake in outlet.
- Once branch, THE Revolution lights up and the configuration begin.
Player Revolution: how to plug my freebox revolution TV ?

To take advantage of the Freebox TV with your Freebox Revolution, you need plug your revolution on your TV. So you can watch the 270 Channels included in the offer TV Freebox Revolution (of which 50 TV channels by Canal Panorama, including Eurosport and Disney Channel).
Here is How to connect your revolution player to your TV ::
- Start by inserting the cable Hdmi In entry video of your TV and in the HDMI output of your Player Revolution.
- If your TV is ever notHDMI compatible, opt for the scalm cable supplied with your Freebox Revolution by connecting it to your TV and your Player Revolution.
- Freeplug : take the power cable To connect it to Port 12V of your Player and connect the Sector intake in a wall outlet.
- For Connect your player to your Server Revolution : if your Playeris close to your server, use a cable Ethernet. Otherwise, take advantage of a connection via the Freeplugs by plug the cable Ethernet of Freeplug In the harbour Ethernet of Player, and doing the same with the Server.
- Everything is connected ! You can now use your TV remote control For Select the video source corresponding to the connection of your Player Revolution (HDMI-1, HDMI-2, AV-1, . )).
Once the connections of your Freebox Revolution TV, the Initialization steps Player on TV Start with in particular the association of the Freebox Revolution remote control at your player, the adjustment of the margins of the TV screen, the TNT scan, .
THE Freebox TV menu is displayed on the screen once your Player Revolution is ready to be used.
Take advantage of the Revolution Player by subscribing to a Freebox Revolution !
Free Jechange Service
Take advantage of the Revolution Player by subscribing to a Freebox Revolution !
Fixed telephone connection Freebox Revolution
THE connection of phone for the Freebox Revolution is very simple and is done in a few minutes.
- Start by connecting the cable to The RJ11 adapter In the harbour Phone On the back of your Revolution.
- Then you will have to insert the phone plug on the telephone adapter RJ11 And restart your freebox.
How to plug my freebox pop ?
There Freebox Pop is the last internet box sold by free. THE connection of the Freebox Pop is relatively simple : installation of Pop server and POLYER POP will be in a few minutes If you follow the tutorial below.
Note that the procedure is not the same as you are connected by ADSL or in optical fiber.
Server Pop Adsl: how to install my box ?
Before starting them branches of your Freebox Pop, it’s important to Position your ADSL POP Server near the phone plug Or Wall ethernet.
Follow the steps below to connect your Pop server in ADSL ::
- Plug it RJ11 cable (the one with the red bits) in the DSL port On the back of your Pop server.
- If your accommodation has a Wall ethernet socket, Insert the other end of the RJ11 cable inside it. If your accommodation has telephone sockets, plug it RJ11 cable In The adapter t then insert the T adapter in the phone plug.
- Plug it power cable In the harbour Power supply on the back of Pop server and the sector intake in the Wall electrical outlet the closest.
- Once connected, the POP Server turns on automatically and the configuration starts. If your Freebox Popblocked on a step, Check the connections And if the problem persists, do not hesitate to Contact Customer Service.
How to connect my fiber optic pop server ?
To benefit from a Very high speed connection, you need Connect your fiber optic pop server, provided your accommodation is eligible for free fiber.
When you connect your free optical freebox, be careful :
- Do not look at it light source optical cables
- Do not bend Free Optical Fiber Cables
- Do not force insertion Or extraction Optical modules
- Make the connections in a clean environment, dustless.
here are the steps to follow for connect your Freebox Pop in optical fiber ::
- First of all, be sure to place your Pop server near your wall optical intake.
- Take the SFP module and insert it into the fiber on the back of Pop server.
- Seize it optical garter and remove it white cap at the end of Blue connector : insert this connector into the SFP module.
- Take the other end of the optical garter and remove the cap from green connector to connect it to the port of your outlet. If your catch is quadrifiber (with 4 ports), connect the garter in the red port, If your catch is bifiber (with 2 ports), opt for the blue port.
- Insert it power cable in the power supply of Pop server and connect to sector the other extremity.
- Now that he is branch, THE Server pop lights up and the process of configuration begin.
Your Freebox Pop blocks in a step ? If your Pop server stay blocked at one of the configuration steps, Check the connections and move your optical garter on a Another wearing of your wall optical plug. To remove the optical cable from its port, pinch on each side of the connector To extract the garter from the optical socket. If the connection problem persists, we advise you to Contact Customer Service of your operator.
You are looking for a freebox pop offer with fiber ?
Free Jechange Service
You are looking for a freebox pop offer with fiber ?
Phone connection to the Freebox Pop
To use your phone with your offer Freebox Pop, You will have to perform them branches following:
- Connect The RJ11 adapter In the harbour Phone Located on the back of your Pop server.
- Insert it phone plug on the adapter and Restart your Freebox Pop.
POP PLOYER: Connection and installation

There Freebox Pop has an offer TV supplied with 220 channels, the access to The Oqee Free and at Amazon Prime (offered for 6 months), to Canal+ Series (offered for 12 months), to Disney+ (offered for 3 months) and Apple TV+ (offered for 3 months).
Follow the following steps to connect your POLYER POP ::
- Insert it HDMI cable in the HDMI outputPOP Player and connect the other end to HDMI entrance of your TV.
- Plug it power cable in the power supply of your POLYER POP and the other end in your electrical outlet.
- If your POLYER POP East Close to your Pop Server, we advise you to connect the two devices Using the Ethernet cable supplied with your Freebox Pop. Otherwise, the connection between your POLYER POP and your Pop server remains possible via the Wireless.
- Use your TV remote control To select the source to which your player is connected.
- Follow the Initialization steps that are displayed on your TV. THE Freebox TV menu appears on the screen when the configuration is finished.
Freebox Delta: Connection and installation of the box
There Freebox Delta is the offer top of the line of the operator of Xavier Niel. With the Freebox Delta, You have access to fastest fiber flow on the market and a TV offer extremely substantial (notably with Netflix and Amazon Prime inclusive).
Two options are possible to enjoy The Freebox Delta TV offer ::
- THE Player Devialet, formerly available for rent for € 6.99/month for 1 year then € 9.99/month.
- The box Apple TV 4K 128 GB, available for purchase for € 2.99/month during 48 months.
- THE POLYER POP, Included with your Freebox Delta and whose connection takes place in the same way as for the Freebox Pop.
Server delta adsl: how my fiber optic delta box ?
Where to connect my freebox delta server ? Before you start the connections of your Freebox Delta, make sure you Position your Server Delta not far from the telephone or mural and ethernet socket.
To put your Server Delta Adsl, Follow the following steps:
- THE DSL module is located in Location 1, has LEFT, On the back of your Server. Insert it RJ11 cable in this DSL module.
- If your accommodation is equipped with Wall Ethernet sockets, connect the other end of the cable RJ11 in the catch Ethernet. If your accommodation has Takes, Insert the other end of the cable in The adapter t, Then this one in the Take t of your wall.
- Take the USB-C connector of Freeplug To put it in the port of your Delta Server then connect on sector the other extremity.
- Once branch, your Delta Server lights up and begins his configuration. If the initialization process ever blocked On a stage, we advise you to contact the Free Customer Service.
Fiber Delta Server: Connection and installation
There Freebox Delta has connection in fastest fiber on the market with a descending speed going as far as 8 Gbit/s.
Facilitate the connections of your Fiber Delta Server to facilitate the connections of your Fiber Delta Server, We advise you to position it Close to your wall optical plug. Note that the fiber module of your Delta Server is located on the right on the back of your Freebox Delta In Location 2.
Here are the steps to follow to Connect your Fiber Optical Delta Server. Before you start, know that there are Two types of fiber modules, Those with and those without blue port.
- Take the optical garter and remove the white cap at the end of the Blue connector To insert it into the blue port of your Delta Server. If you have a Fiber module without blue port, Full insert the SFP module in the fiber On the back of your Delta Server.
- Enter the other end of the optical garter and remove it cap of green connector and connect it to the port of your Wall optical socket. If your catch is quadrifiber (with 4 fiber ports), connect the connector to the red port. If she is bifiber (with 2 fiber ports), connect your connector to the blue port.
- Then insert the USB-C connector of Freeplug in the port of your Delta Server and connect the other end to the Sector intake.
- Your Delta Server lights up and its configuration starts. If this one block at a step, We advise you to call the Free Customer Service after having Check the connections of your Freebox Delta.
Take advantage of the best fiber flow on the market by subscribing to a freebox delta !
Free Jechange Service
Take advantage of the best fiber flow on the market by subscribing to a freebox delta !
Fixed phone connection Freebox Delta
Good news ! You do not have No connection to do to enjoy the Free telephony with your Freebox Delta.
- Your operator automatically activates your number landline in 09 and the various services associated with it.
- The only thing to do on your side is the Connection of your phone at the port Phone, Located on the back of your Delta Server.
Player Delta Devialet: How to connect the Freebox TV ?

Now that your Delta Server is connected, you must connect your Player Delta Devialet To take advantage of the Freebox TV on your Freebox Delta.
Did you know ? Two options are possible to enjoy the TV on your Freebox Delta : either you opt for simplicity with the POLYER POP (included in the offer Delta), either you choose The high -end option with the Player Delta Devialet (rental for € 6.99/month for 1 year, then € 9.99/month)).
If you use the Player Pop with your Freebox Delta, the procedure of connection is here even that to operate the POLYER POP with a Freebox Pop.
The steps to follow for connect your Player Delta Devialet are listed below:
- Plug it HDMI cable In HDMI video entry of your TV and on the back of your Player Devialet (door)).
- Freeplug : insert the connector USB-C in the Port B of Player Devialet and connect the Sector intake To feed your Player Delta.
- THE Player Delta Devialet lights up and is ready to be configured, It doesn’t matter where your Delta Server compared to your Player. However, if your Player Devialet East close of your Delta Server, Connect the two boxes by connecting the Ethernet cable in the Port C of Player Delta and the other end in the Port B, C, D or E of your Delta Server. Conversely, if your Player Devialet and your Delta Server are relatively remotely, The connection between the two devices will be automatically by wifi.
- Use your TV remote control To select the video source on which your Player Delta Devialet is connected and follow the Initialization steps (in particular the association of the Freebox Delta remote control, the TNT scan, the configuration of voice assistants, . )).
- THE Freebox TV menu appears: the Player Delta Devialet is properly branch And ready to operate !
You are looking for a freebox offer ? Discover the available offers and let yourself be guided in order to take advantage of the partner offer most suited to your needs.
How to connect my devices to my freebox wifi ?
At the end of thefacility, you will be able connect your devices at the wifi of your Freebox by going through one of these methods:
- Seize it WIFI password Registered on the Freebox cardboard and on the Free subscriber After selecting the network issued by your box from the device you want to connect.
- Connect to your device and your Server Delta using the Ethernet cable supplied with your freebox.
Goodbye to extended wifi codes ! Flash the QR code Present on your Server Freebox to connect each device in all simplicity !
Freebox mini 4K connection: how to install it ?
The mini 4K is no longer available ! Since the end of 2022, the Freebox Mini 4K is no longer marketed by the operator of Xavier Niel. The Free Box catalog is now limited to offers Freebox Revolution, Freebox Pop And Freebox Delta.

There Freebox Mini 4K is no longer marketed by Free since the end of 2022. However, many Free subscribers remain holders of this box including the connection is relatively simple : installation of Server Mini 4K and Player Mini 4K will be in a few minutes If you follow the tutorial below.
Note that the procedure is not the same as you are connected by ADSL or in optical fiber.
Server Mini 4K ADSL: How to install my internet box ?
Before starting the branches of your Freebox Mini 4K, we advise you to Position your Server Mini 4K ADSL near your phone plug Or Wall ethernet.
To connect your Server Mini 4K in ADSL In a few minutes, follow the steps below:
- Insert it RJ11 cable (this is the one with the red bits) in the Port n ° 1 DSL, Located on the back of your Server Mini 4K.
- If your home has a Wall ethernet socket, insert The RJ45 adapter in it and insert the other end of the RJ11 cable inside of The RJ45 adapter. If your accommodation has telephone sockets, connect the Block T in the phone plug.
- Plug it power cable of Freeplug In the harbour N ° 7: 12V on the back of Server Mini 4K and the cable RJ45 of Freeplug in one of the ports Ethernet Free (at the back of your 4K Server Mini).
- Finally, connect the Sector intake of Freeplug in outlet To feed your Freebox Mini 4K.
- Once connected, the Server Mini 4K turns on automatically and the configuration starts. If your Freebox Mini 4Kblocked on a step, Check the connections And if the problem persists, do not hesitate to Contact Customer Service.
Server Mini 4K: how to connect it to optical fiber ?
To benefit from a Very high speed connection, you need Connect your Optical Fiber Mini 4K Server, provided your accommodation is eligible for free fiber.
here are the steps to follow for connect your Freebox Mini 4K in optical fiber ::
- Before starting the connections of your Freebox Mini 4K, be sure to place the Server near your wall optical intake.
- If you have a optical converter : insert to the end sound black block in the fiber (on the back of your mini 4K server) then connect the power tip of the converter in the Port 12V. Afterwards, cap Optical converter.
If you do not have an optical converter: take the SFP module and insert it into the fiber of Server. - Seize it optical garter and remove it white cap at the end of Blue connector : insert this connector in the SFP module or in the optical converter Depending on your situation.
- Take the other end of the optical garter and remove the cap from green connector to connect it to the port of your outlet. If it’s a catch quadrifiber (with 4 ports), connect the garter in the red port, If the socket is bifiber (with 2 ports), it will be the blue port.
- Insert it power cable of Freeplug in the tip 12V of optical converter or in the port 12V at the back of your Server Mini 4K.
- Cable RJ45 of Freeplug To put it in one of the ports Ethernet free, then connect the Sector intake of Freeplug in outlet.
- Now that he is branch, THE Server Mini 4K lights up and the process of configuration begin.
You are looking for a freebox offer with fiber ?
Free Jechange Service
You are looking for a freebox offer with fiber ?