


Cut part of an image – Microsoft support, how to cut an image for free. and in 5 seconds?
![]()
How to cut out an image for free … and in 5 seconds
To start, go to online service Remove.bg.
Cut a part of an image
For an image in a fileoffice, you can delete parts of the image that you do not want to include.
As described below, you start with the automatic deletion of the background. Then you manually indicate the areas of the image you want to keep and delete.
For vector graphics files, such as SVG (Scalable Vector Graphics), Adobe Illustrator Graphics (AI), WMF (Windows Metafile Format) and DRW (Vector Drawing File), the removal of the background is not possible. In these cases, the delete background option is gray.

Original image

Same image after certain parts have been deleted
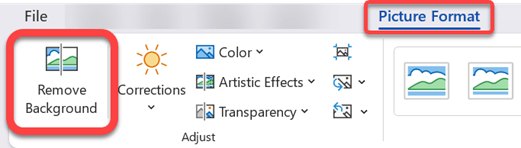
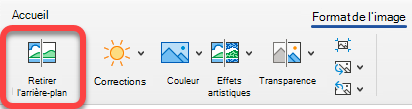
- Select the image you want to delete the background.
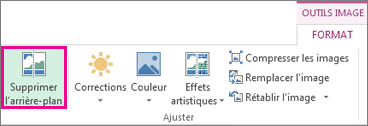
- In the toolbar, select Image format >Delete the background Or Format >Delete the background.
 If you do not See you delete the background, Check that you have selected an image. You may have to double-click the image to select it and open the tab Image format .
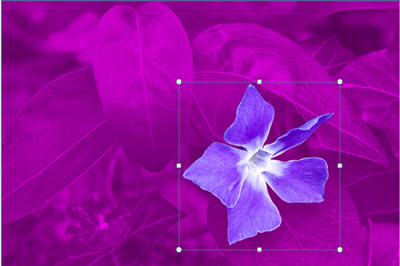
 - The default background area is magenta color to mark it for deletion, while the foreground retains its natural color.
- Then, in the toolbar, go to Background removal And perform one of the following operations or both:
- If parts of the image you want to keep are Magenta (marked for deletion), select Mark, Then use the free -shaped drawing pencil to mark the areas of the image you want to keep.
- For the parts of the image you want to delete who are not yet Magenta, select Mark out areas, Then use the drawing pencil to mark these areas.
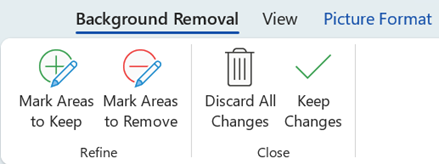
- When you have finished, select Keep the changes. The magenta areas of the image are deleted, leaving a transparent background.
- If you want to save the image in a separate file for subsequent use, right -click on the image, select Image, Then save the file on your device.
See as well
- Select the image you want to delete the background.
- Below Image tools, under the tab Format , in the group Adjust , select Delete the background.
- Click on one of the marquet line handles, then drag the line so that it contains the part of the image you want to keep and exclude most of the areas you want to delete.
 You can sometimes get the desired result without any additional work by experimenting with the position and size of the brand lines.
Advice : To cancel the marked areas, select Delete the brand , Then select the line.
- If parts of the image you want to keep are Magenta (marked for deletion), select Mark, Then use the drawing pencil to mark the areas of the image you want to keep.
- For the parts of the image you want to delete who are not yet Magenta, select Mark out areas, Then use the drawing pencil to mark these areas to be deleted.
See as well
- Select the image.
- Select the tab Image format ribbon, then Select Delete the background.
 If the tab Delete the background Or Image format does not appear, check that you have selected an image. You may have to double-click the image to select it and open the tab Image format .
 - The default background area is magenta color to mark it for deletion, while the foreground retains its natural coloring.
- Then, in the toolbar, go to Background removal And perform one of the following operations or both:
- If parts of the image you want to keep are Magenta (marked for deletion), select Mark, Then use the drawing pencil to mark the areas of the image you want to keep.
- For the parts of the image you want to delete who are not yet Magenta, select Mark out areas, Then use the drawing pencil to mark these areas to be deleted.
- When you have finished, select Keep the changes. The magenta areas of the image are deleted, leaving a transparent background.
- If you want to save the image in a separate file for subsequent use, right -click on the image, select Image, Then save the file on your device.
How to cut out an image for free … and in 5 seconds ?


Decuting an image to make a photomontage is no longer a practice reserved only for Photoshop followers. An online, free service, the fact for you in a few seconds.
You would like to make a joke to a friend by cutting his photo to encrust him in another decor but your skills in this area are limited ? The art of photomontage is no longer only reserved for warned users of image editing software like Adobe Photoshop.
Remove.bg, An online service developed by Benjamin Groessing and David Fankhauser, is responsible for deleting the background of your photos in record time, without you having to get your hands dirtying. The tool, accessible for free, uses an artificial intelligence which identifies the presence of people in a photo in order to dissociate them from the background.
The export of cut images is currently limited to a resolution of 500 x 500 pixels but could soon evolve to offer better quality. Here in a few fast steps, how to cut an image to integrate it into a new landscape.
1. Cut a photo
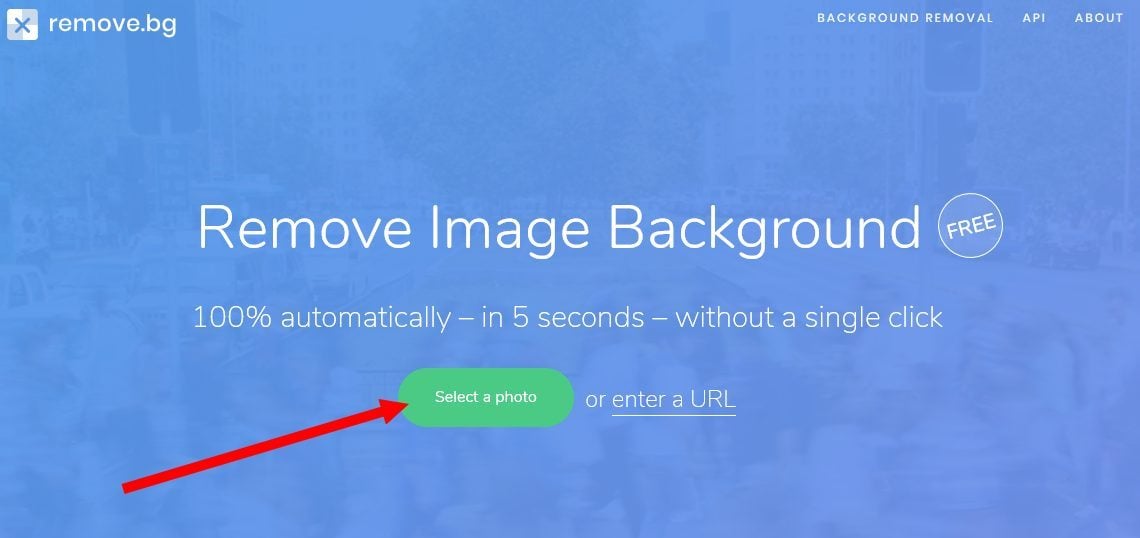
To start, go to online service Remove.bg.
Click on Select a photo To choose an image stored on your computer’s hard drive or click ENTER AN URL to import an image from a link.
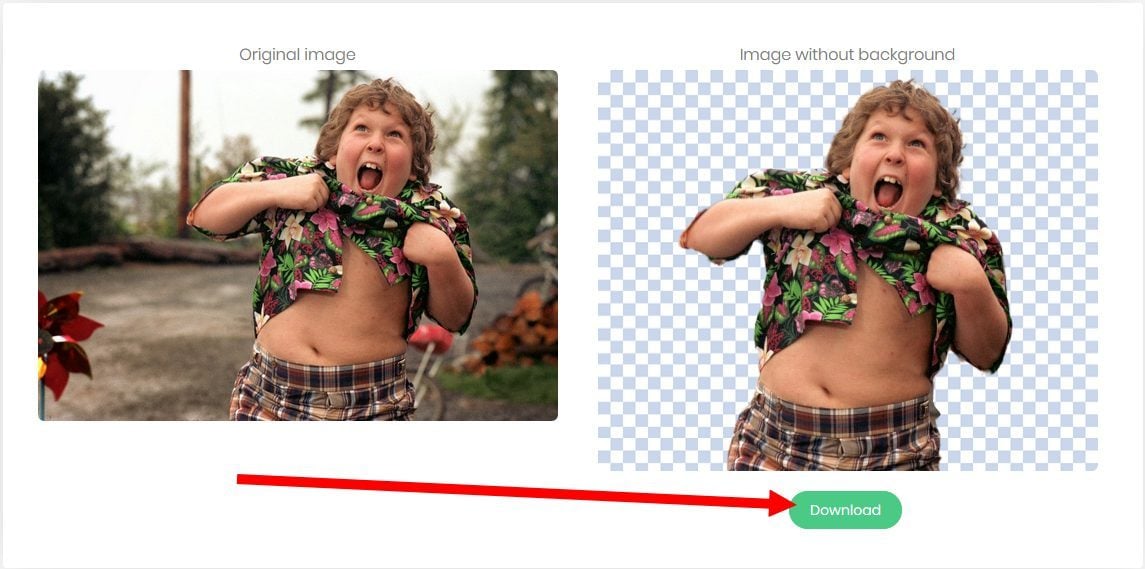
The site automatically detects those present in the photo and is responsible for automatically deleting the background. The original image and the result obtained are immediately visible on the page. Click on Download To download the cut image on your hard drive.
To discover also on video
2. Create a photomontage
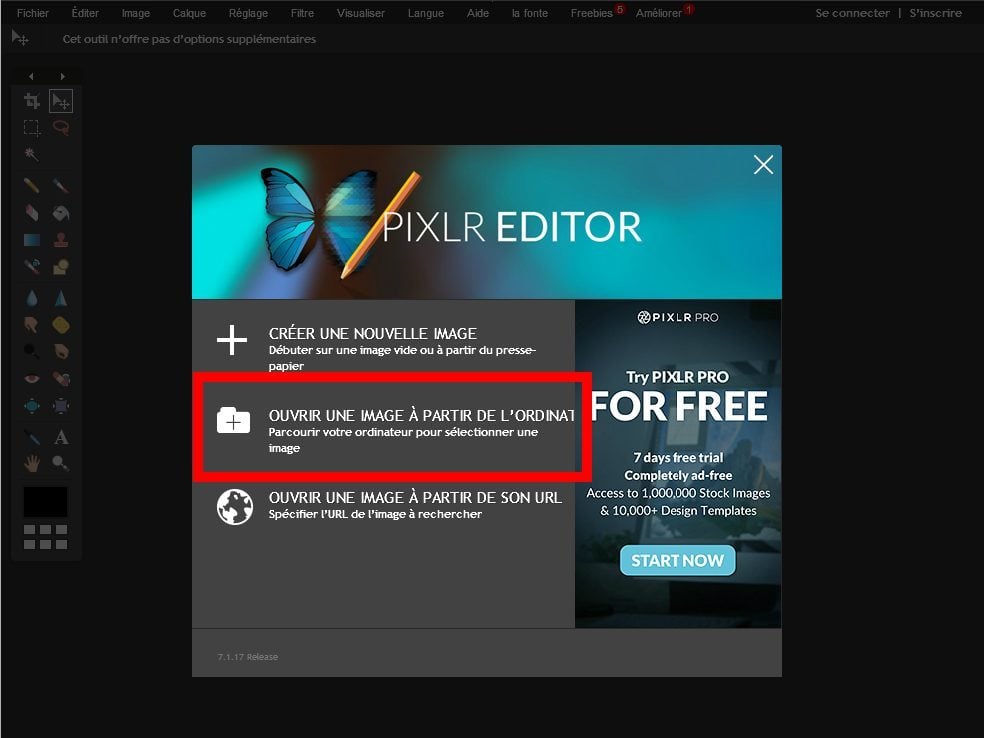
If you do not have a photo editing software installed on your PC, open your favorite web browser and go to Pixlr. This online image editor is free and allows you to do small work and photo retouching from your browser.
From the home page of Pixlr, click on Open an image from the computer, Then select the two images you want to import into the editor (keep the CTRL key on the keyboard to select several images of the same directory).
Place yourself on the layer with the cut-off image by clicking on it, use the keyboard shortcut Ctrl+A To select the whole image, then Ctrl+C To copy it to the clipboard.
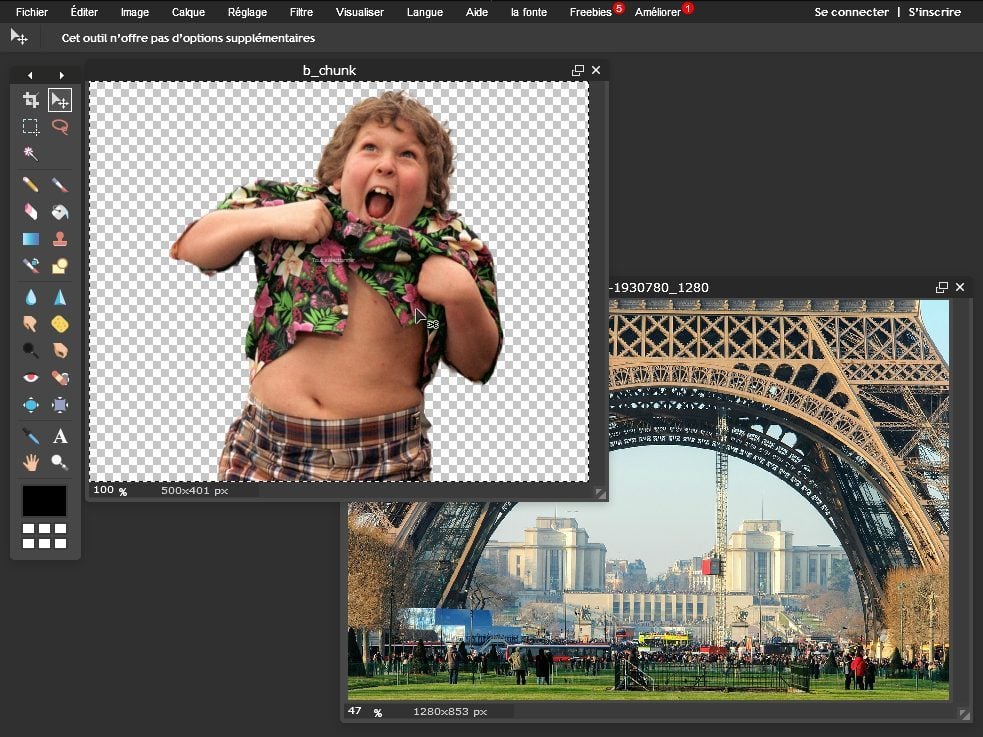
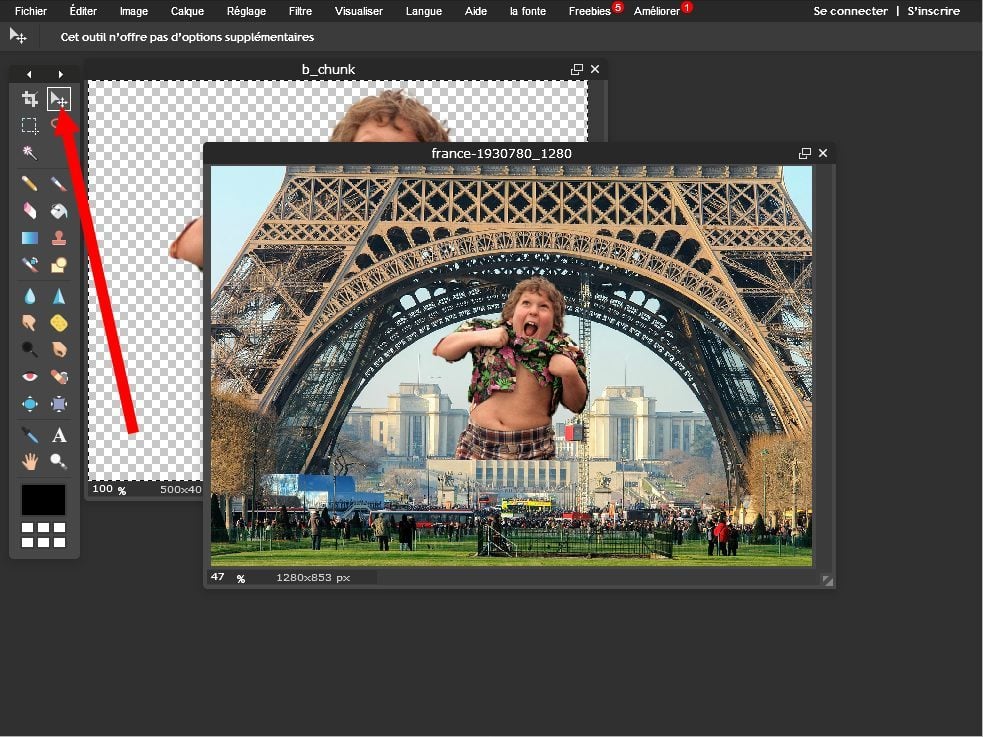
Then place yourself on the image that will be used as a new background by clicking on it, then do Ctrl+V To stick the cut image. Choose the travel tool (keyboard keyboard) and move the cut-out image where you want it on the background for the background.
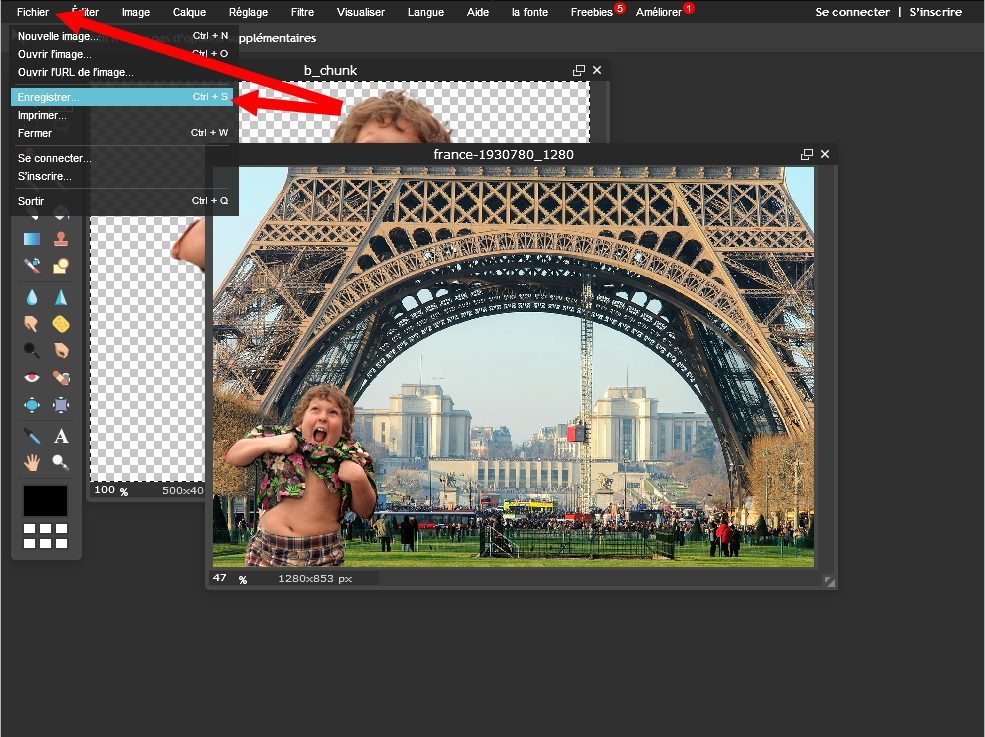
Once your image is properly positioned, click on File, then on Save.
Enter a name for your image, change the quality of recording using the dedicated cursor, and click on OK.
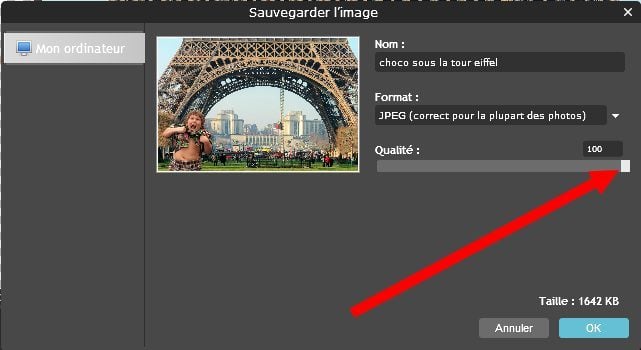
Windows file explorer opens, choose a backup location and validate by clicking on Save.