


16 Best Tips for Portrait 2023 photography, the 15 tips for a successful portrait photo
![]()
The 15 tips for a successful portrait photo
For an optimal shooting, there is a technique that makes your subject more attractive and dynamic: lower your chin and look up (you on the other hand, the super photographer, keep your eyes fixed on the lens;) )).
Portrait photograph – 16 Best tips for creating superb portraits
An excellent portrait photograph is the result of the combination of good technique with the expression of an artist. Follow these 15 best tips to master the art of capturing superb portraits.
First practiced by artists such as Picasso, portrait paintings have a great story of narration. Taking superb portraits is the modern form of the same technique. Although it requires much less effort than painting, capturing the expressions and emotions that make up a good portrait photograph can take time to master.
What is portrait photography ?
Portrait photography is the art of capturing the inherent character of your subject in a photograph. An excellent portrait photograph is the result of the combination of good technique with the expression of an artist. Technical: Use the camera settings, compositions, angles, lighting, backgrounds and appropriate poses. Kind: It is a question of capturing a breathtaking and moving portrait that evokes feelings among spectators and captivates their attention. Although this interrogative definition covers the basics, portrait photography goes far beyond the simple click on photos of people. A good portrait photograph is as much to follow the rules and directives as to get out of the mold. We have drawn up an exhaustive list of best practices and techniques to make good portraits. Here are superb photography website models designed for your use.
Present your portrait photograph with a breathtaking portfolio website.
Here are the 16 best portrait photography advice to master art:
- Concentrate on the subject
- Find the right location
- Take the right pose
- Take candid portraits
- Capture emotions and expressions
- Learn to use your camera
- Choose the right goal for portrait photography
- The bottom counts
- Understand how the shutter speed, opening and ISO work together
- Create a color palette for your portraits
- Portrait photography lighting
- Try different angles
- Use of accessories for the effect
- Breaking the rules of portrait photography
- Make a series of portraits
- Edition and post-treatment
1. Take a focus on the subject
The subject is the most important aspect of portrait photography. Making the subject comfortable with you is an essential factor for a successful portrait photography session. Take the time to connect with your client before the photo session and, if possible, meet in person. It is best to get to know yourself and inform the subject of your style of photography and what you are looking for when shooting. Discuss your ideas on filming with your subject and take into account its preferences and capacities in your plan.
An average telephoto lens like 85 mm or 105 mm will allow you to find a balance between your model and the background.
If the photo is supposed to be tight, focusing only on the subject, then a 70-200 mm f/2 telephoto lens.8 is an excellent choice. It allows you to zoom and focus more on your subject. You also reduce the amount of background and foreground distraction displayed.
If the photo is supposed to be tight, focusing only on the subject, then a 70-200 mm f/2 telephoto lens.8 is an excellent choice. It allows you to zoom and focus more on your subject. You also reduce the amount of background and foreground distraction displayed.
8. The context counts
The emphasis in the portrait, as planned, is on the subject model. However, there are more complexities than that. Sometimes an interesting background can add a lot of drama to the photo and help your subject stand out.
In most cases, however, properly blur the portrait background can put more emphasis on the subject. It is therefore imperative to see what the background will look like and adjust the shutter speed and opening accordingly.
Ready to create your professional photography website?
9. Understand how the shutter speed, opening and ISO work together
No photography will be out of your reach if you understand the exposure triangle or the interrelation of three elements – shutter speed, opening and ISO. Understanding these concepts will open new options in your photograph and will allow you to capture portraits that were previously out of reach. Here is a complete guide to the exhibition triangle and first understand the individual elements of the opening, the shutter speed and the ISO.
You must also examine the important concept of light judgments and be able to understand how the opening is measured in F-Stops. Stops are often divided into halves or even third parties for better control of the exposure value of an image. Although the numbers used in the above examples are roughly standardized numbers by industry, the fractions of stops are often rounded up or down by manufacturers. The numbers may not correspond exactly, but the concepts are the same regardless of the type of camera you use.
11. Portrait photography lighting
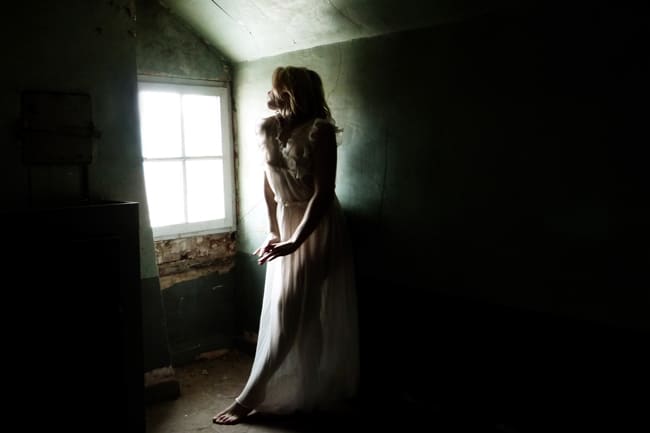
If you have already taken a physics course on the light, you would have learned that the light is directional. Lighting is essential for a photographer and constitutes the golden rule of lighting in photography. Directional lighting is the reason why standing in front of a light source will make the subject dark and barely visible. Likewise, having a light source on the side will light up half of the subject and the other half in the shade.
For a completely lit photo, it is also easier to stand in front of a light source. Creative use of the sun as a light source in outdoor portrait photography can produce amazing results. A good photographer must be able to use the available lighting to its advantage.
14. Breaking the rules of portrait photography
Understanding the rules and practicing them may be a precursor to show creativity and break the rules. When you violate the rules, you create unusual and unique work that would do your brand, especially when you are in a session of elderly people.
Exit the beaten track and experience different portrait photography ideas, camera angles, composition and even models. For example, although the third -party rule is an effective formula for composing balanced images, breaking this rule by placing your subject on the edge or in the center can create convincing and impactful photos.
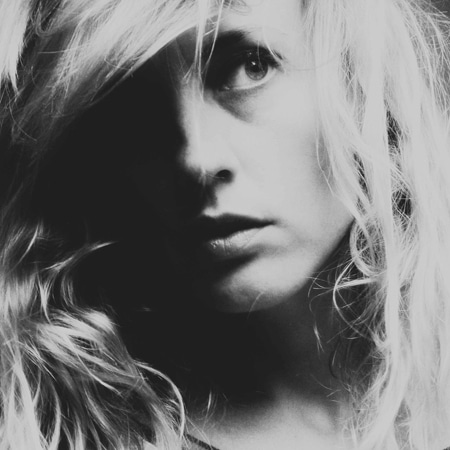
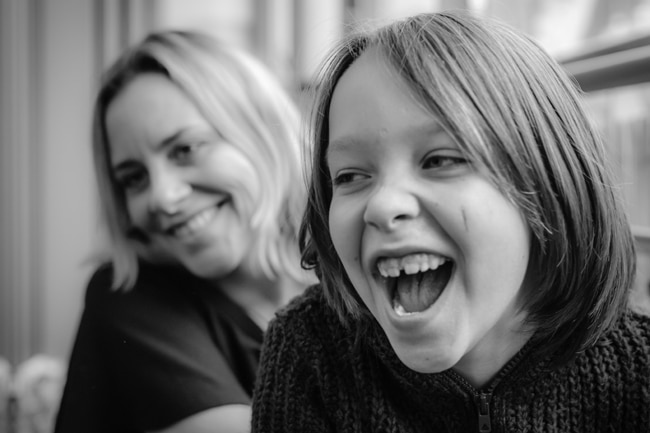
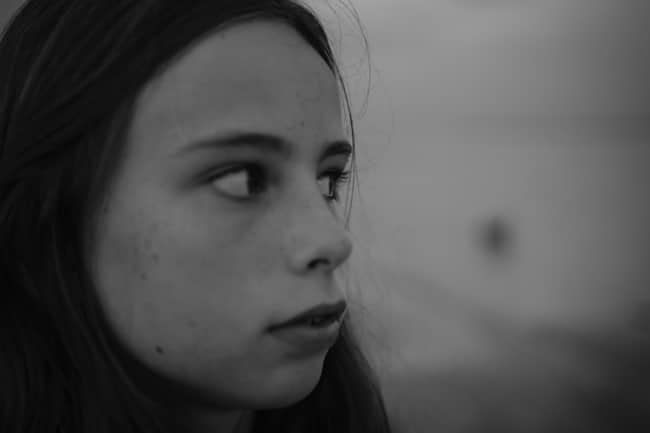
Tip: black and white portrait photography creates intimate and personal portraits
15. Take a series of portraits
Using the “burst” or “continuous shooting” mode of your camera to click on a series of shots that capture the different poses of your moving subject is an excellent technique.
The series of images can be presented together, creating a feeling of drama and movement, or you can choose the shots with the perfect expressions among the group of images.
16. Edition and post-treatment
Although taking a photo is undoubtedly essential, beginners can often neglect the importance of a montage and an appropriate retouching in professional portrait photography. A large part of the “professional” of images is due to appropriate editing techniques.
Although it is a completely different subject in itself, some simple techniques can considerably improve the quality of your photos. Purists can consider publishing as negative, but programs like Photoshop are only tools to improve your images.
Consider a situation where you took a photo in the head and where part of the body is not visible in the. Maybe one of the hands is too wide to be included in the. Now you have to crop your hand to keep the face on the face. However, when reframing the ends, make sure to crop back halfway between the members or the joints. Crop a half biceps or half-avant-bras will make your image better proportioned. Always avoid cutting your fingers, shoes or hair of the image, as it tends to ruin your portrait.
Advice: RAW format shooting offers you great flexibility at the post-processing stage.
There are many different tools that you can use, but the most common are by far instasize, Adobe Photoshop and Lightroom. For a good reason too, because they can easily do everything you need to do while remaining relatively affordable.
Instasize is intended for those working with mobile photography and can be downloaded for the two iOS and Android devices. In addition to referring and resizing photos, beauty tools can be used to automatically smooth portrait imperfections with a minimum of hassle. Its catalog of color borders and filters can also be used to improve shots.
You can use Photoshop to touch up or delete image elements. Sensitive content and cloning tool can allow you to erase unwanted objects. Even if you are already satisfied with the quality of your photo, retouching can help you enhance your favorite visual style and express your creativity.
Most software has presets that you can select according to your special conditions. Then you can individually modify the photos to produce the best result. You can then export the image with the desired quality settings.
Here are some examples of portrait photography portfolio for your inspiration:
Es media
Emilee Setting is a photographer based in Oregon, in the United States, who wishes to create art through her company ES Media. Emilee is passionate about what she does and wants to show her creativity through what she does. See her portfolio, which also includes the outdoor portrait photography that she makes.
Catherine Dotson Photography
Catherine is a Montana -based photographer who makes many types of portrait photography, from child portrait photography to family portrait photography. She graduated from photography and has more than four years of experience. In his work, you can also see his love for black and white photographic portraits. If you are looking for an example of how to mention the price of portrait photography on your website, consult your portfolio of portrait photography.
Photograph by Christina Wilken
Christina lives in Illinois and her career towards the photograph of professional portrait began at the birth of her son. She specializes in the photograph of family portrait, photography of portrait of children and couple. She does photography in natural light and likes the candid style more than posed.
Joris Peeters
By opening the Joris website, you can see significant information but simple black and white photography portraits. Joris uses photography as a medium to meet people and is interested in creating authentic portraits. Joris lives in Belgium; She also makes portraits of children and family.
Ruben Singh
Reuben is a photographer based in Delhi who entered photography while he was studying at the College of Art in Chandigarh. His professional portrait photograph manifests the original personality of the people he depicts, who can sometimes seem humorous. His photographic work is exposed in international magazines such as Harper’s Bazaar, The Wall Street Journal, etc.
Amit Mehra Photography
Amit has been in the field of photography for a few decades. His work was exhibited in London, Tokyo, New York, Sydney, among others and published a few books of photography too. His work also includes photography of art portrait, which highlights a particular temperament of the subject.
Ready to create your professional website ?
Conclusion:
An aspect that you must not forget is that there is no perfect way to capture a representation. It will always vary from one image to another. It is not a robotic and stereotypical process. Portrait photography is a creative process that merges art and technique to create striking visuals capturing human emotions and expressions.
We hope that these 16 portrait photography tips have given you ideas, ideas and inspiration to master the art of capturing breathtaking portraits.
This article is written in collaboration with Photowhoa.com where you can get products selected to improve your photograph.
Frequently asked Questions
How to master portrait photography ?
Like any other art, the key to mastering portrait photography is the practice. It also helps if you can create a real connection with your subject to evoke good emotions and expressions and capture them with your goal.
What are the 3 types of portrait photography ?
Traditional or formal portraits, candid portraits and glamorous portraits are the three most common categories of portrait photography
Which is a famous portrait photo
Sharbat Gula, also known as “The Afghan Girl”, is the subject of a famous portrait directed by Steve McCurry in Afghanistan. The portrait became emblematic after being chosen to cover the June 1985 edition of the National Geographic magazine.
Who is the best portraithest photographer in the world ?
Yousuf Karsh was a Canadian-Armenian photographer best known for his emblematic portraits, notably those of Albert Einstein, Martin Luther King Jr and Winston Churchill. Karsh is the most famous and best known portraitist photographer of all time.
The 15 tips for a successful portrait photo
Your thing to you are people. Take a picture of them, from all angles And in all situations. Congratulations, you are a portrait painter !… A what ?! A wind instrument ? And no, he’s a lover of humans photography. And since we are a bit like your Summer Buddy (failing the body), the one who gives you his best pipes to succeed in your photos, we offer you the flagship of our 15 most concrete tips to succeed and/or perfect a photo portrait !
Summary
Our top 15 tips for a successful photo portrait !
- 1. Success a selfie photo portrait for sure
- 2. The “portrait” photo mode, too neglected !
- 3. Treat the frame and the photo composition portrait
- 4. The right light, at the right time
- 5. The posture of 3/4 = perfect for a photo portrait
- 6. Eye Contact: The focus on the look of the figurative
- 7. Use decor or accessories !
- 8. Lower your chin and look up from the appearance
- 9. A perfect portrait photo with a “diving” angle
- 10. Photo of portrait or landscape, this is the question
- 11. Auto-focus and focus on the image
- 12. Good poses for good photos
- 13. What format for my portrait photo ?
- 14. Smile, or don’t smile ?
- 15. Break the Rules ! Creativity above all !
1. Success a selfie photo portrait for sure
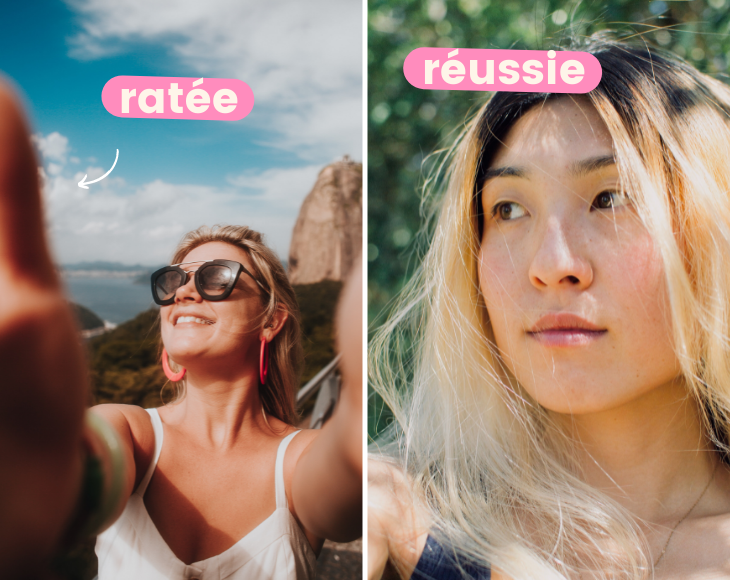
Yes, because even if you are a portrait painter, selfies, It has good when you want everyone to be in the photo !
Remember to deactivate The flash During your selfie sessions. First, the flash side screen on the phone is not the most effective then it will bring out the small imperfections (it is not the purpose of a photo shoot !))
Finally, make sure that you do not see your arm (the idea is that you see as little as possible that it is a selfie), so exit the breaks SO 2015 where you were holding your phone with both hands to take your selfie !
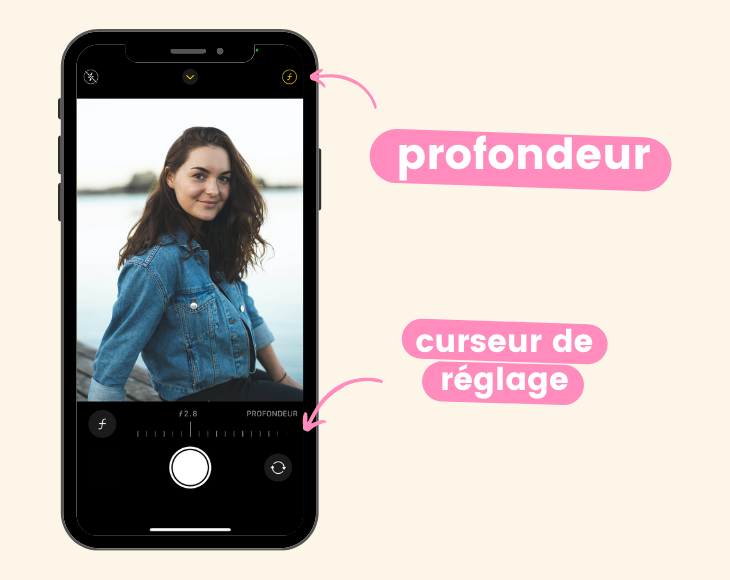
2. The “portrait” photo mode, too neglected !
We have several techniques to enhance your photos, and we will all give them to you (we are nice) ! So go to the Portrait mode of your phone here we go !
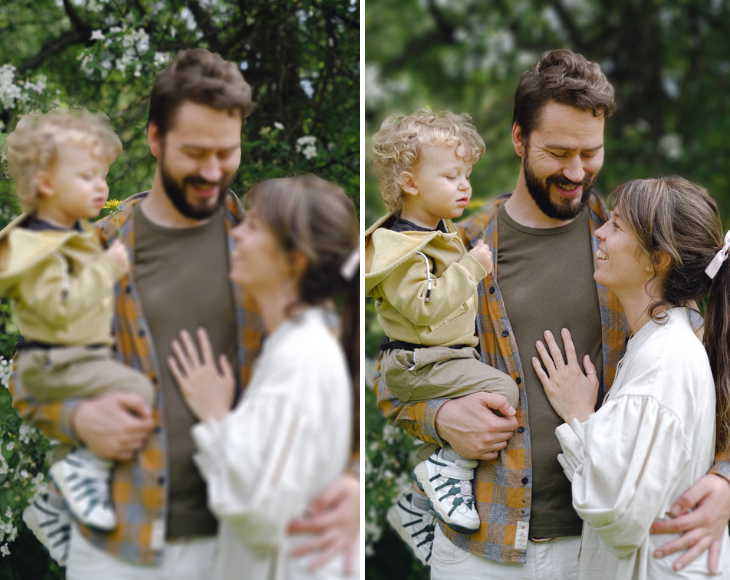
- Change The depth of field From your portrait photo: a little blur in the background is good, too much it’s blah. To modify this depth on iPhone, touch the small F in the upper right corner of the screen when you are on the camera application. Then a control cursor should appear. You can drag it to adjust the depth as you like !
- Play on the lighting, We wouldn’t want to seem to have an overpowered projector turned on us, the natural, there is nothing better !
- We also work the exhibition : 0.7 It’s not bad to look good �� You can also adjust it on – 2 if you want to make believe that your photo has been taken at night, why not ! Or of course -1.3 if you want to look a little sick, or on +2 to appear out of a UV cabin, it is a concept !

FYI: you can remove the portrait mode of a photo if you are not satisfied with the result ! For that, nothing could be simpler, go to the photo in question then Edit> Portrait> Activate or deactivate !
3. Treat the frame and the photo composition portrait
You have surely already watched these videos which give you the right photo framing, the areas in which people place, on which line must be on the horizon … And maybe like us, you no longer know where you have saved this trick ! Don’t panic, we explain it all here. But think about screenshot This tip and keep it in your gallery, create for example a “Tips” file To find them ��
The first advice to give you is to avoid focusing the subject of the photo.
The second is to display the rules to have the best possible framing:
- On iPhone: Settings> Camera> Composition – Grid> Activate
- On Android : Camera> Click on the icon with a camera, a + and 3 small points> Manual> Click on the icon with a camera and a film> Click on the icon with 3 small points> Click on the Settings icon> Grid lines> Activate
Now that it’s done, we will be able to use the third party rule !
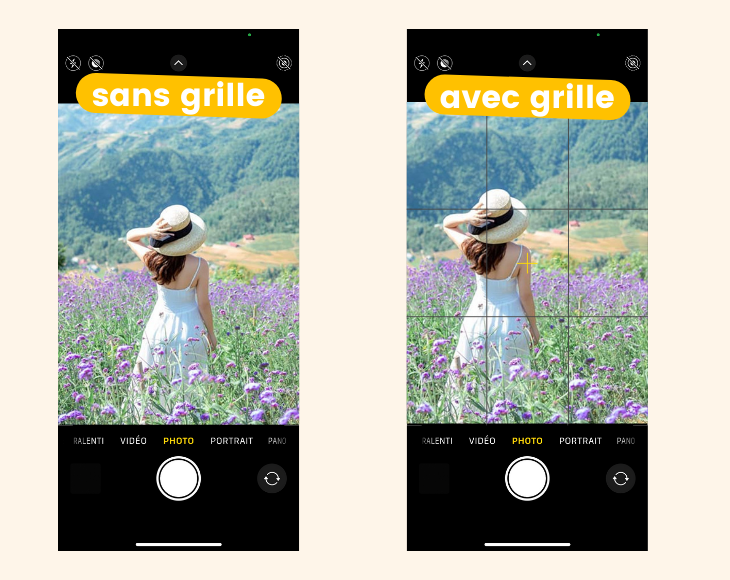
- As part of a portrait photo, the idea is to place The “strengths” of the image (like eyes for example) on the lines of the grid or in terms of intersections.
- In the frame of a “half-large” plan (By that we mean a photo in which there are two elements to take into account: the decor and a person, and the latter is not entirely visible), we advise you to reserve a third party for the person, right or to left and remaining 2 thirds in the decor or secondary people if there are any.
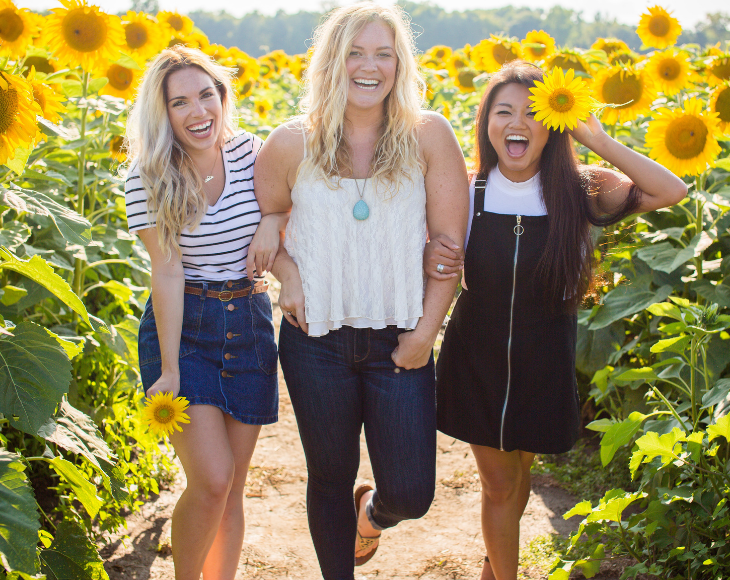
- In the frame wider (when you take your friends in a photo with a beautiful landscape behind for example), you can apply the previous framing method or place your friends in the lower third and decor in the upper 2 thirds !
4. The right light, at the right time (avoid full sun)
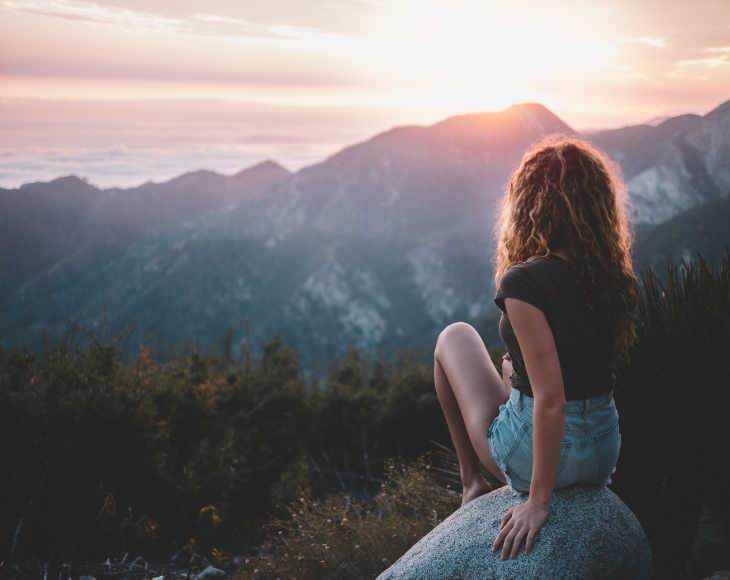
THE Golden Hours, we say yes. The best time for memorable shots ? At dawn, if you are an early rise – it is recalled that in summer, the sun rises around 6 am – or during the sunset (be careful there is a little more people If you shoot on a beautiful spot !)). If you want many other tips for a successful photos during the Golden Hours, it’s here .
The points on which you have to be vigilant when you take photos outside:
- The backlight ..
- His shadow on the photo (there can be a certain artistic side, in this case why not but otherwise, we pay attention to that our shadow is not visible in the !))
- The problem of shadows on the face: to avoid this, try to place the sun about 40 ° behind your model.
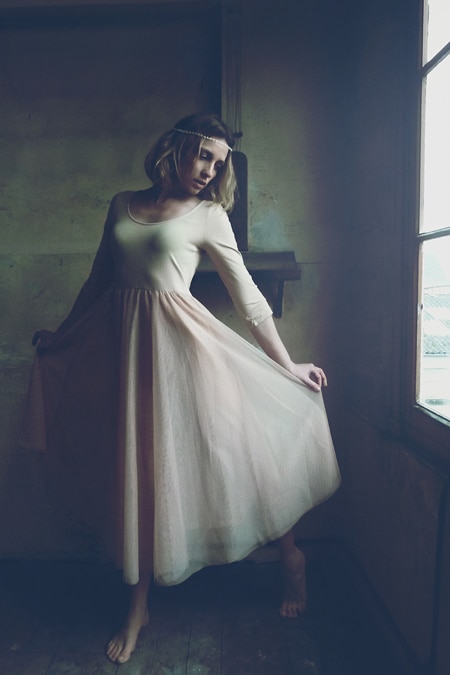
5. The posture of 3/4 = perfect for a portrait photo

It will allow your model to highlight its good profile ��
People are generally more comfortable to pose ¾ (being in front of the goal can be a little scary, even if the camera is your best friend) !
6. Eye Contact: The focus on the look of the figurative

3/4 yes, but eyes fixed towards the lens .. We would advise you to ask your model to look at the goal !
If you are looking to do a slightly more creative photo session, you have the soul of a real photographer and you are ready to guide your models, then several possibilities are available to you !
- Looking towards the horizon, style determined
- Looking right above or next to the lens, this one we put it just to tell you not to do it. It may be more to do failed photo that stylish photo !
- Looking down, almost closed eyes, style melancholy
- The slightly bias look and lifted to the sky, style thinker or dreamy, a choice !
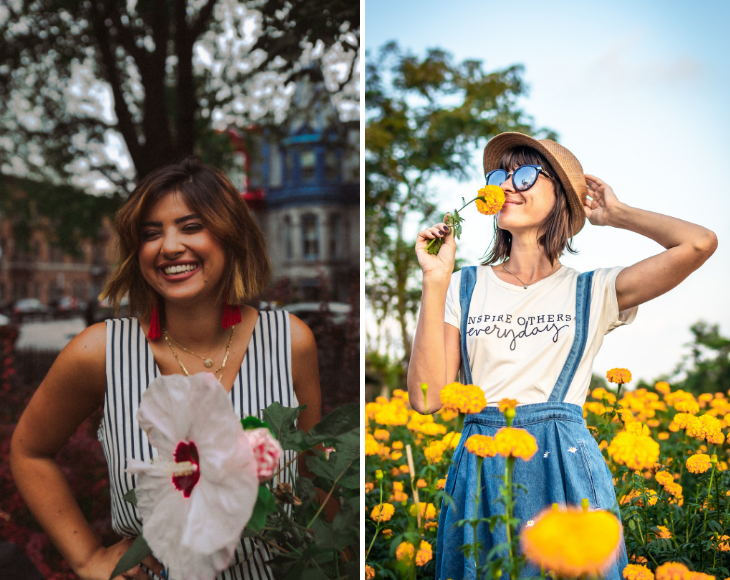
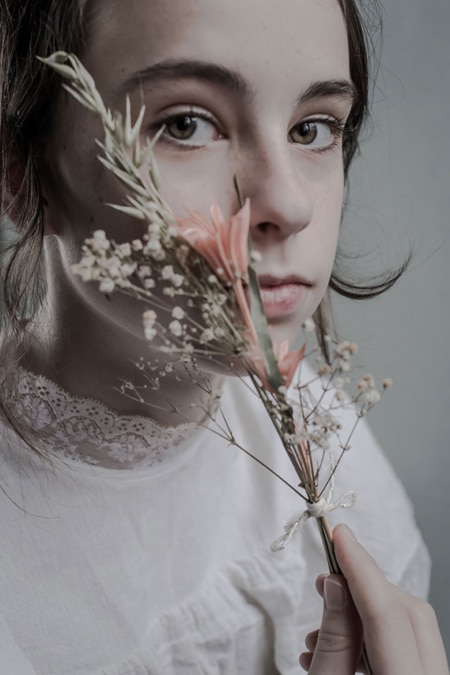
7. Use decor or accessories !
As we told you in tip n ° 3, the decor is super important to have a good frame and a superb final rendering, it will play a major role in your portrait photo !
What we advise you:
- Match colors or tones Between the landscape and the holding of your model (the accessories can be useful to achieve a beautiful result !))
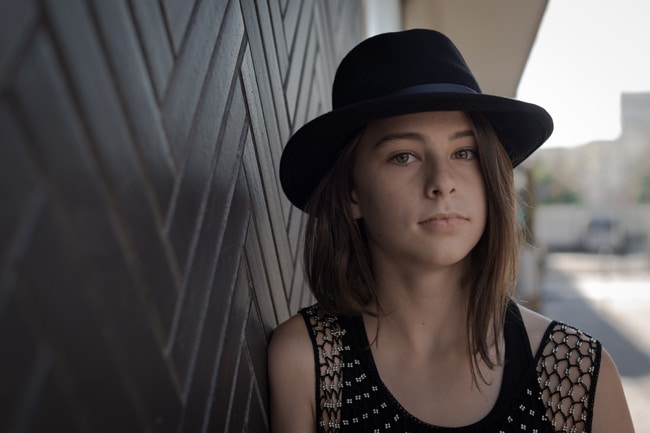
- To integrate Your model at the decor, that he plays with what surrounds him. A tree ? Ask your model to take the pose leaning against him. The background must always be taken into account !
- Accessories can also be used to make the focus on a part of the photo
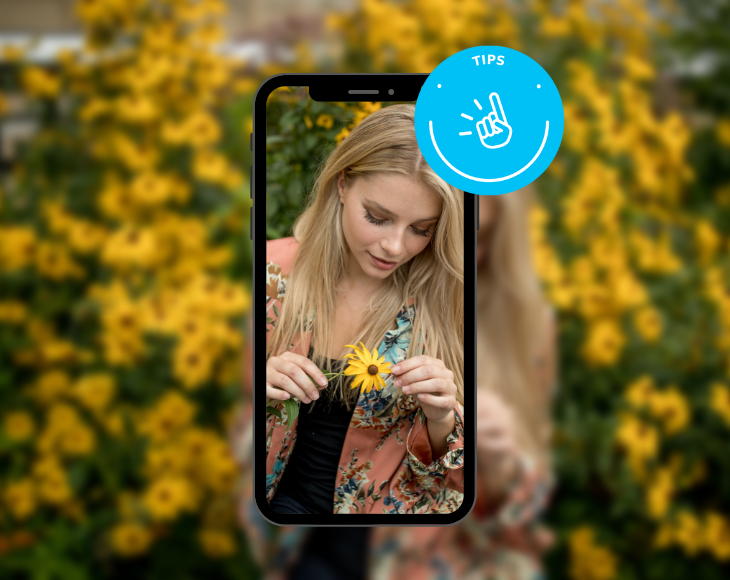
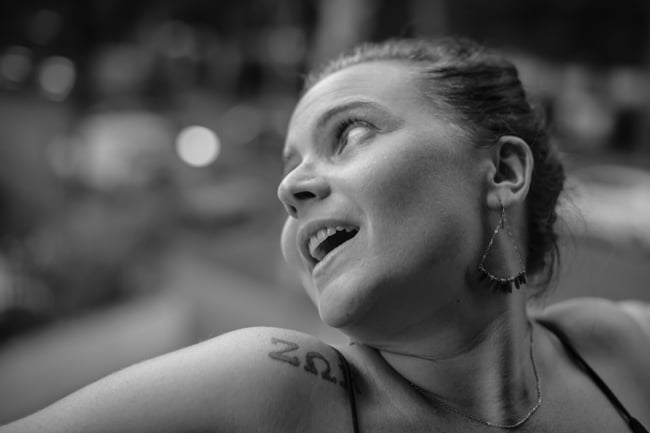
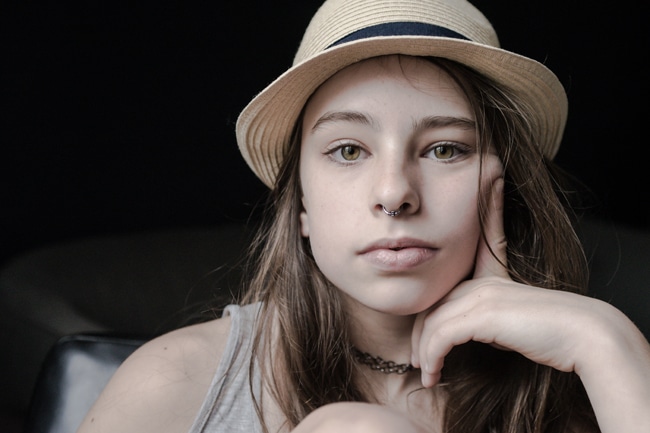
8. Lower your chin and look up from the appearance
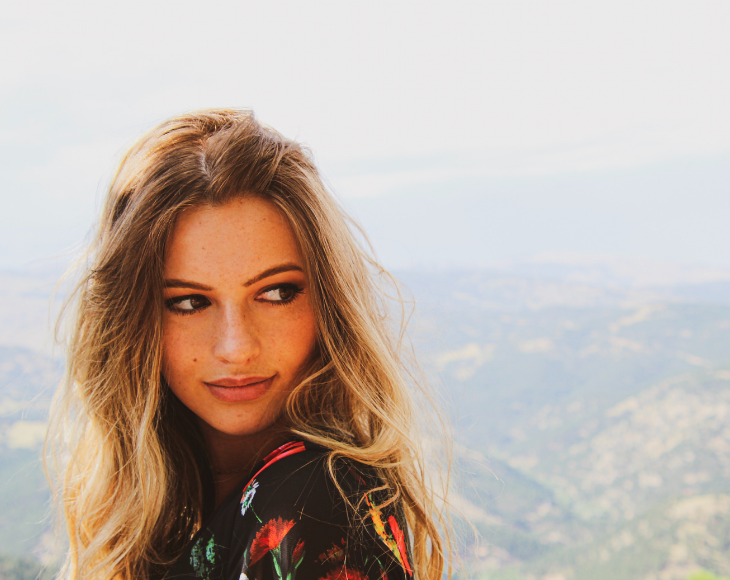
In a portrait photo, what we like is seeing the beautiful face of our model.
For an optimal shooting, there is a technique that makes your subject more attractive and dynamic: lower your chin and look up (you on the other hand, the super photographer, keep your eyes fixed on the lens;) )).
This posture is also a good way to avoid the shadows of the face which we were talking about in tip n ° 4, when your model poses from ! And of course, we never forget the look (and if necessary we reread tip n ° 6).
9. A perfect portrait photo with a “diving” angle
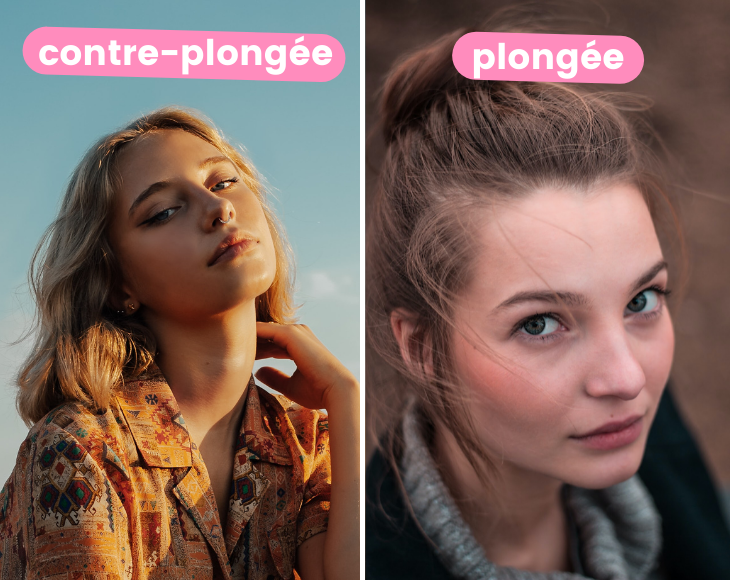
We talk about it here as a tip but there is a photographer who uses it without even reporting, it is … the parent ! Yes, when he takes a picture of his children, it is very often with a diving angle.
Of course, to portray a person, you have to dose the tilt. We will not take your subject in a photo with a shooting perpendicular to the ground ! On the other hand, a slight inclination can create a feeling of intimacy with the photo, confidence.
As for the angle in counter-angled, in moderation ! (Especially if you don’t want the double chin to get the encrust in the photo).
10. Photo of portrait or landscape, this is the question
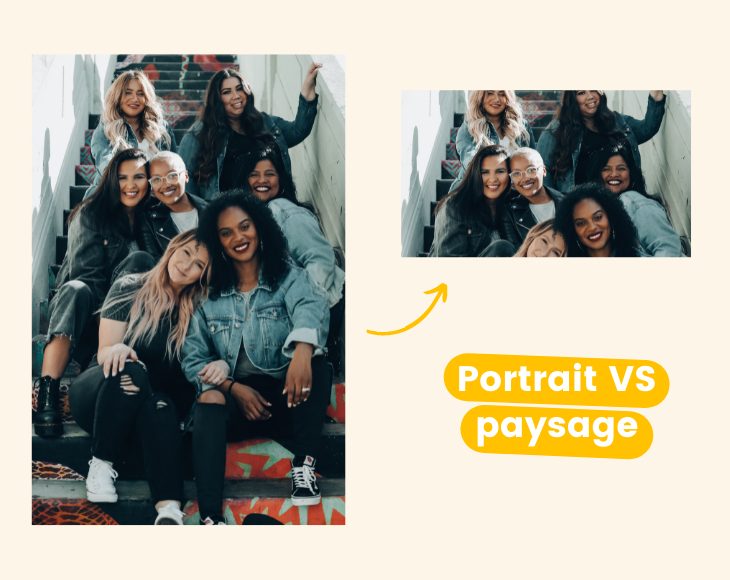
With the arrival Stories or tiktoks, We get into the habit of taking our photos in portrait format: why not. But you have to keep in mind that it can close certain doors regarding the use of photos. Indeed, it can be complicated to transform a photo taken into portrait format to a landscape format (especially when you are about to print your prints or your photo album …) or even in a square version.
The advantage of landscape format, It is that we can more easily integrate the decor in the photo. The photo is immediately more filled !
What we recommend ? THE landscape format certainly ! Both because your friends will be even more beautiful in front of a great sunset than for its ease of being cropped !
11. Auto-focus and focus on the image
Little tip but not least, think of it focus When you take your photos. We wouldn’t want our model to be blurred !
Just click on the point you want to focus on, your smartphone will take care of the rest !
12. Good poses for good photos
Knowing how to pose is a job and only a professional photographer would be able to manage a photo shoot ! But don’t panic, we will give you some tips that you can then repeat to your model for your portrait photo.
What do we do with our arms ?
As a future photographer, you can recommend that your model Place your hands on your hips But what we especially recommend is to play with accessories: a bag, a pair of sunglasses, a jacket, everything is good for the hands are busy !
And our legs ?
You can advise your model cross the legs slightly By putting a foot forward, or to spread your feet and switch the weight of your body on one side … Make your creativity work !
13. What format for my portrait photo ?
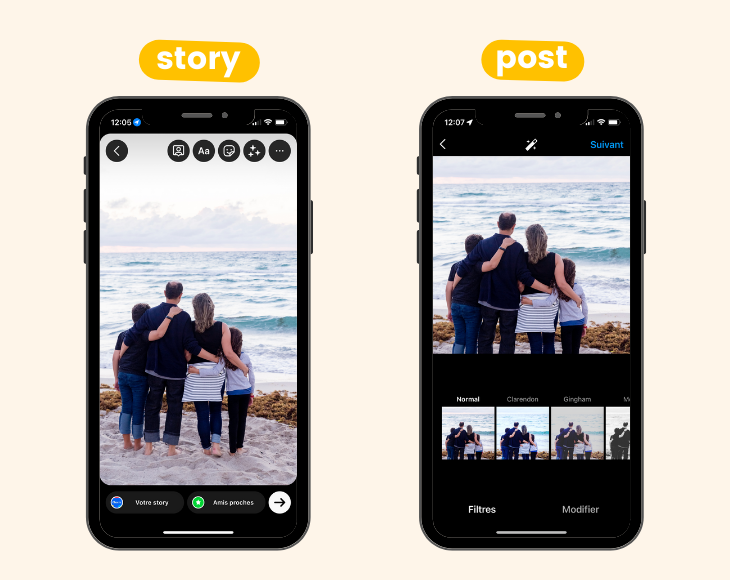
Yes because if you want to post it on Instagram, already, there, a question arises: Story format (vertical) Or Post format (square) ?
And if you want to print it ? There too, there are several possible formats !
- The classic you can find here !
- The retro format to discover here !
We have two methods to offer you:
- Favor the Format 4: 3 (classic) in horizontal And place your friends, family, model, in short your subject so that it does not fulfill the entire field. In this way, you can cut the photo if you want to transform it into a square format !
- Decide in advance of what you will do with your shots. To choose is to renounce ! However, it is possible to pass of a story format (16: 9) to a square format, easier in any case than to do the opposite !
14. Smile, or don’t smile ?
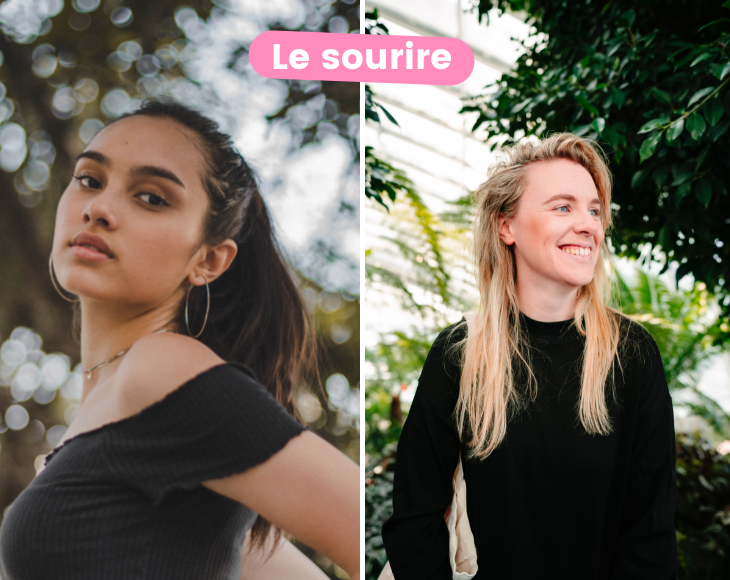
Of course your model must smile for its portrait photo (you too, you should keep smiling throughout the photo session;))).
The question would rather be: smile with teeth or without teeth ?
It’s up to you, photographer, to enter the moments real and authentic To immortalize them. A smile that is true = the most beautiful of smiles !
15. Break the Rules ! Creativity above all !
Because after all, portrait photos are above all to have memories ! So the primary goal is above all that something happens when you find them and look at them again a few years later !
Be creative in your poses, in your framing, in your accessories, in your grimaces … And if you were trying to take a photo by doing the opposite of our tips, what would it give ? Come on, it is trying !
Succeeding in a portrait photo is to give the impression of the natural, but according to a skillfully worked composition. Thanks to our 15 tips, this is the goal you will now achieve !
And above all, do not forget the most important in a photo session: Muse yourself and immortalize the moments that you want to remember all your life.
15 tips for a successful portrait photos !
A successful portrait often results from several factors. Although there is no magic recipe and sometimes some portraits work, ignoring all the rules, some parameters can greatly influence the result.
Here is 15 tips to quickly improve your portrait photos , And this, Without expensive equipment , of flashes, light boxes, funds or any other fitted equipment in the photo studio. We will review the basic criteria that we often find on the subject, then a few tips and suggestions that will bring this little something extra to your images.
1/ Equip the right equipment
To make beautiful portraits, the 85mm is often presented as the focal length par excellence, allowing to make tight portraits and to obtain a nice blur of field depth.
Yet the 50mm Also is a good choice, which produces quite a few distortions, it is the focal length considered to be the closest to human vision.
We will be wary of the Grand Angle Type 24mm , Una -adapted to the portrait if you want close -ups because they produce deformations that will not flatter the features of your model (station with the “elongated nose” effect). If on the other hand you want to frame wide and write your model in its environment by showing on your shots a large part of what is around, why not.
2/ Take advantage of light
Some lights highlight the faces, others are not. We avoid images taken in full sun: They are uncomfortable for your model which will fold their eyes and frown the eyebrows; The full sun also produces intense contrasts, the faces will lose their modele. The lights in diving (coming from above) are not very flattering: They will show dark circles under the eyes, marked wrinkles, dug features.
Rather, place your subject in the shade, in indirect light, or opt for a side light by positioning it near a window for example. If the light passing through the window remains too intense, a veiling placed in front will be enough to diffuse it. Also remember to equip yourself with a reflector to unclog the shadows on the side of the face which does not directly receive the light. Here is an example where we can distinguish on the left, on the neck and oval of the face, the light that the reflector brings:
We can also voluntarily do without reflector for a dramatic effect, with only one side of the face in the light, the other in the shade:
Outdoors, think of grazing lights at the end of the afternoon that will enhance end details and create a net of light on the hair or contours of the body. Or counter-day which will create silhouette effects, dramatic atmospheres or transparency games on clothing:
3/ watch in the background
On a portrait, your subject, it’s your model. We too often see images with a loaded background, cluttered with a bunch of elements that disturb the photo reading. Consider rather, either A sober background , united and neutral that will fade in favor of your model:

Or on the contrary, A graphic environment , With lines or patterns that will participate in the composition of the photo:
We invite you to read our article on the importance of portrait backgrounds !
4/ put your model at ease
This is the point that poses the most difficulties to students or photo amateurs and it is therefore on this one that we will spend a little more time. Photograph models, especially if they are strangers, ask to know make people you photograph at ease . A model on his guard will not be able to indulge in a share of himself. This discomfort will be palpable on the final images, its expressions and poses will seem unnatural, forced.
You have to start with discuss to establish a bond of confidence with your subject. And not just a photo ! Ask him a few trivial questions On his life, his work, offer him a coffee. Even a little trivial subjects will make you exchange a few sentences: the weather, the holidays, whatever .. you have to break the ice ! As you discuss, you will realize that the model relaxes, its gestures are less borrowed, more fluid, its jaw released.
This step can and must continue when you start to target it with your device to make your settings . At this stage, you should prevent the discomfort suddenly from reappearing. Just explain what you do, While continuing to chat with him.
Even if this is not the case at the start of the session, Compliment your model, reassure it with some encouraging sentences : ” Yes it’s very good ! “,” That’s it, it’s perfect, don’t move anymore ! »». Simple words that will get him to relax a little more. Keep in mind that amateur models doubt a lot of them, and often people find it difficult to appreciate in photos which does not make them comfortable immediately. So you have to start with erase their apprehension with these encouragement.
Once this phase has passed and your subject more confident, comes the time for you to direct your model To get what you want and We will have to help him a little ! Because very often, they do not know what to do with their arms, their hands, nor how to place themselves. It’s up to you to kindly suggest other poses : “And if you turn your head slightly to the left, it gives ? “, ” Alright ! Lower your chin a little to see… ”etc. Apart from experienced models that will spontaneously offer you good things, you will have to direct all the others, so assume this role of “management” because it is part of your work.
Other tip To capture more spontaneous images: make diversion. Draw their attention to something around you and better still, make them laugh ! A good way to capture authentic smiles and install a lighter atmosphere beneficial for the rest of the session . Remember that it is better for your model to have a good time to let go:
When you feel that his gaze is too fixed, or his eyes widened in an unnatural expression, Use the tip of “Close your eyes, open your eyes ! »». Ask him to close your eyes, make your settings and prepare your framing; When you are about to trigger, ask him to open your eyes quickly. He will not have time to adopt a dreary or empty look in such a short time. Same thing for the jaw and mouth which are too tense: sometimes ask him to open his mouth, to loosen the teeth, so that his features are more relaxed.
5/ Background blur
When you are in manual mode, a large opening of the diaphragm is ideal for the portrait. Thus, your model which will be clear since it is on him that you will have developed, will elegantly detach from the bottom which will be plunged into the blur. A vague one called The blur of “field depth” ::
6/ Highlight your model
A good portrait is also a portrait that flats the model. The expressions and looks he adopts, must highlight it (we avoid taking someone talking or chewing), Some poses also work better than others . For example, we avoid views in a counter-angry, rarely aesthetic.
Depending on his morphology, certain poses will be more appropriate: to lower his chin will make his eyes appear bigger, taking it in very light will also give the impression that it is thinner. Another widely used tip: the laying of three-quarters who will refine his face on a tight portrait, or his silhouette for a portrait in the foot:
7/ Think about its composition
The rule of third parties, we often talk about it in photography and it applies to the portrait of course. For those who do not know it yet we talk about it in this article. Do not center the body of your model or its face in the middle of the framework ! At a minimum, place your gaze on a third -party line (in general the upper line), and/or its silhouette on a line of vertical third party.
Think about your wearing as an architecture image: The strong elements (eyes, face, body, hands, arms) must be positioned in the strategic places of the image, that is, the lines of third parties and the points of strength:
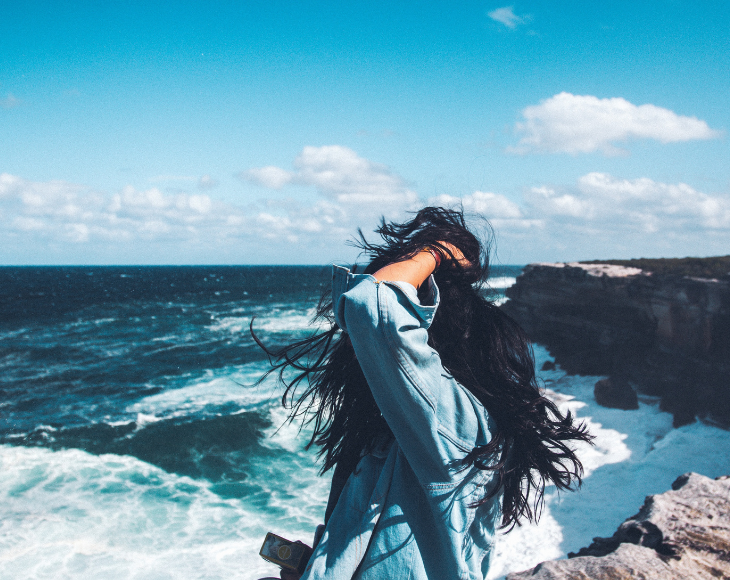
Generally, We will also leave room in the context in the same direction as the gaze of the model . A person looking at the side, makes the spectator want to look in the same direction. We should therefore not immediately stop on the edge of the frame, but on the contrary, have space to direct our eye on this part that the model seems to look:
8/ Include his hands
A portrait, even tight, does not mean that only the face must enter the framework. Include the hands of the model offer You are advantages: It will be an additional point of grip in the composition of your image and your model will finally know what to do with it ! A chin placed in the hollow of the palms, or well -placed hands and arms will bring a structure to the portrait: